


Chapter 8 Managing Drives and Disks
Working with Tape Drives
StorNext User’s Guide 190
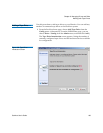
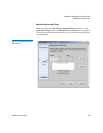
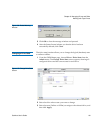
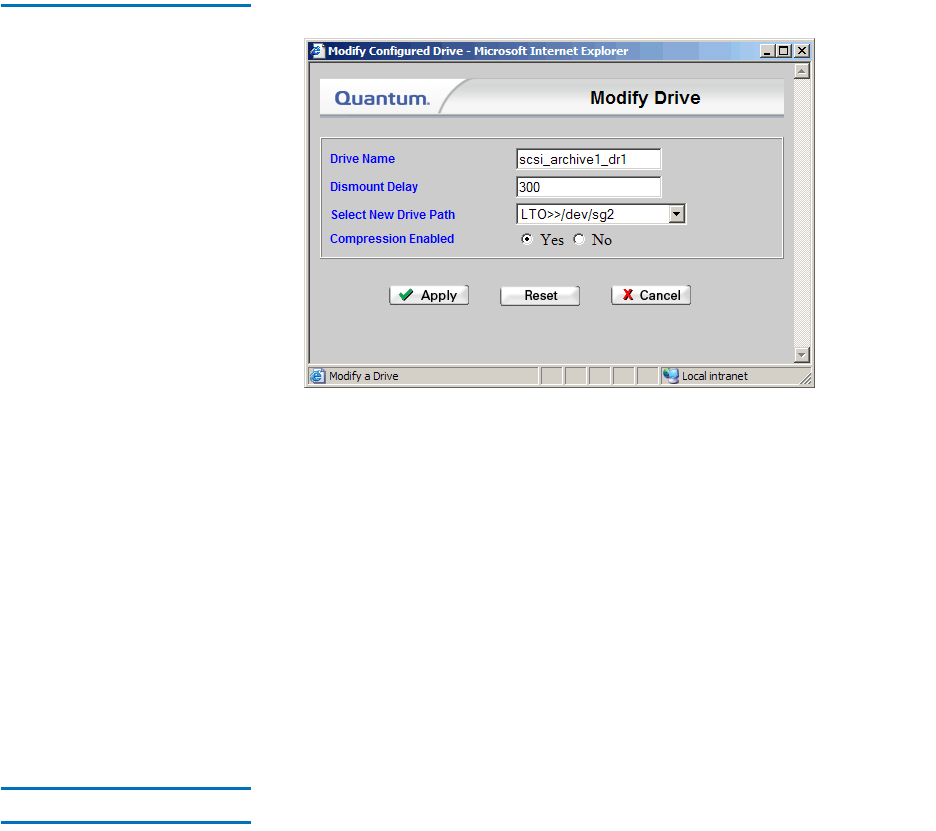
Figure 135 Modify Drive
Screen
3 Modify any of the following information:
• Drive Name: The name of the modified drive.
• Dismount Delay: Change the dismount delay time (in seconds).
• Select New Drive Path: The drop-down menu displays available
drive paths to which the drive can be changed.
• Compression Enabled: Choose Yes to enable, or No to disable
compression.
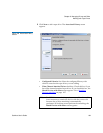
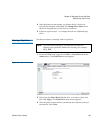
4 After making drive modifications, click Apply.
5 After the Status Screen informs you that your modifications were
made successfully, click Close.
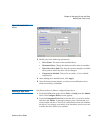
Deleting a Tape Drive 8
Use this procedure to delete a configured tape drive.
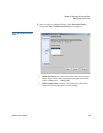
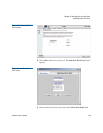
1 From the SNSM home page, choose Drive > Config from the Admin
menu. The Configure Drives screen appears.
2 From the Configured Drive List, select the drive you want to delete,
and then click Delete. A message prompts you to confirm that you
want to delete the drive. There is no undo function that will undelete
the drive if you change your mind, so be absolutely certain you want
to delete the drive before you continue.