


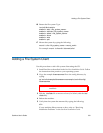

Creating a Disk-to-Disk Policy Class
StorNext User’s Guide 335
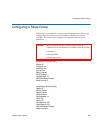
StripeBreadth 512
Node CvfsDisk2 0
Node CvfsDisk3 1
6 Save and close the configuration file.
7 Use cvadmin to start the file system by typing the following:
/usr/cvfs/bin/cvadmin
snadmin> start <file_system_name>
snadmin> activate <file_system_name>
snadmin> select <file_system_name>
snadmin> show
8 Mount the file system by typing the following:
mount -t cvfs <file_system_name> <mount_point>
For example: mount -t cvfs snfs1 /stornext/snfs1
9 Create an affinity/directory association by typing the following:
/usr/cvfs/bin/cvmkdir -k <affinity_name> <directory_name>
For example: /usr/cvfs/bin/cvmkdir -k data1_aff /stornext/snfs1/
video_data
This associates all data written to /stornext/snfs1/video_data with
stripe group Data1 and, therefore, disks CvfsDisk2 and CvfsDisk3.
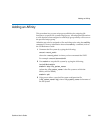
Creating a Disk-to-Disk Policy Class
Use this procedure to create a disk-to-disk-specific policy class. You must
have at least two affinities configured to create a disk-to-disk policy class.
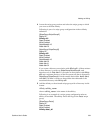
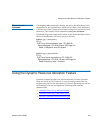
Before initially executing any StorNext command line programs, you are
required to source either the .profile or the .cshrc file. This will update the
user environment with the StorNext environment variables.
• If you are running sh, ksh, or bash, type:
. /usr/adic/.profile
• For all other shells, type:
source /usr/adic/.cshrc