


Capture Window
The Capture window is used to capture video from a camcoder or VCR that is
connected to the PC via i.LINK (IEEE1394), creating AVI files.
Note
• Please contact your supplier or Sony sales representative for information on the
video devices that you can use for capturing.
Other video devices may be used, but depending on the device, some operations,
such as shuttle control and cue-up operations, may not be available.
• Picture and sound do not synchronize during capture. Although some noise may be
output from the speaker, it will not be contained in the captured AVI file.
• Depending on the operating environment of your PC, the captured AVI file may
have skipped (dropped) frames. The In and Out points of the captured AVI file have
a margin of error of two frames or less, respectively.
Screen and the Time Code Indication
The screen shows the video of the connected video device subject to control by the
video device controller.
The time code indication displays the current time code of the video device in blue. No
indication appears when the connected video device is in the camera mode, though.
While capturing, it counts up from 00:00:00:00 in red.
Video Device Controller
Controls the connected video device.
It has play, stop, and pause buttons, as well as fast forward/rewind (shuttle), and single-
frame step buttons for both directions.
Clicking the fast forward/rewind (shuttle) button changes the play speed.
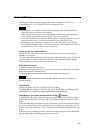
Note
Depending on the video device connected, there may be some buttons that do not
operate correctly.
Folder Button
Changes the folder where the created AVI files are stored.
The folder that was used last is selected. The "AVI" folder under the folder in which
the BZNP-100 was installed is selected immediately after installation.
In/Out Buttons, Time Code Text Boxes and Cue Up ( ) Buttons
Controlling the video device and clicking the In or Out button at the desired position
defines the In or Out point. The time code of the defined In/Out point appears on the
right.
If you are using a tape recorded in the DVCAM format, you can enter the time code of
the In or Out point in the text box and click the corresponding cue up button to specify
and cue up the desired point up. Then, click the In or Out button to define the In or Out
point.
In the case of live recording, the time upon start recording appears as the In point, and
the time at the end of recording appears as the Out point.
105