100
USING PHOTOSHOP ELEMENTS 8
Color and tonal correction
Last updated 7/26/2011
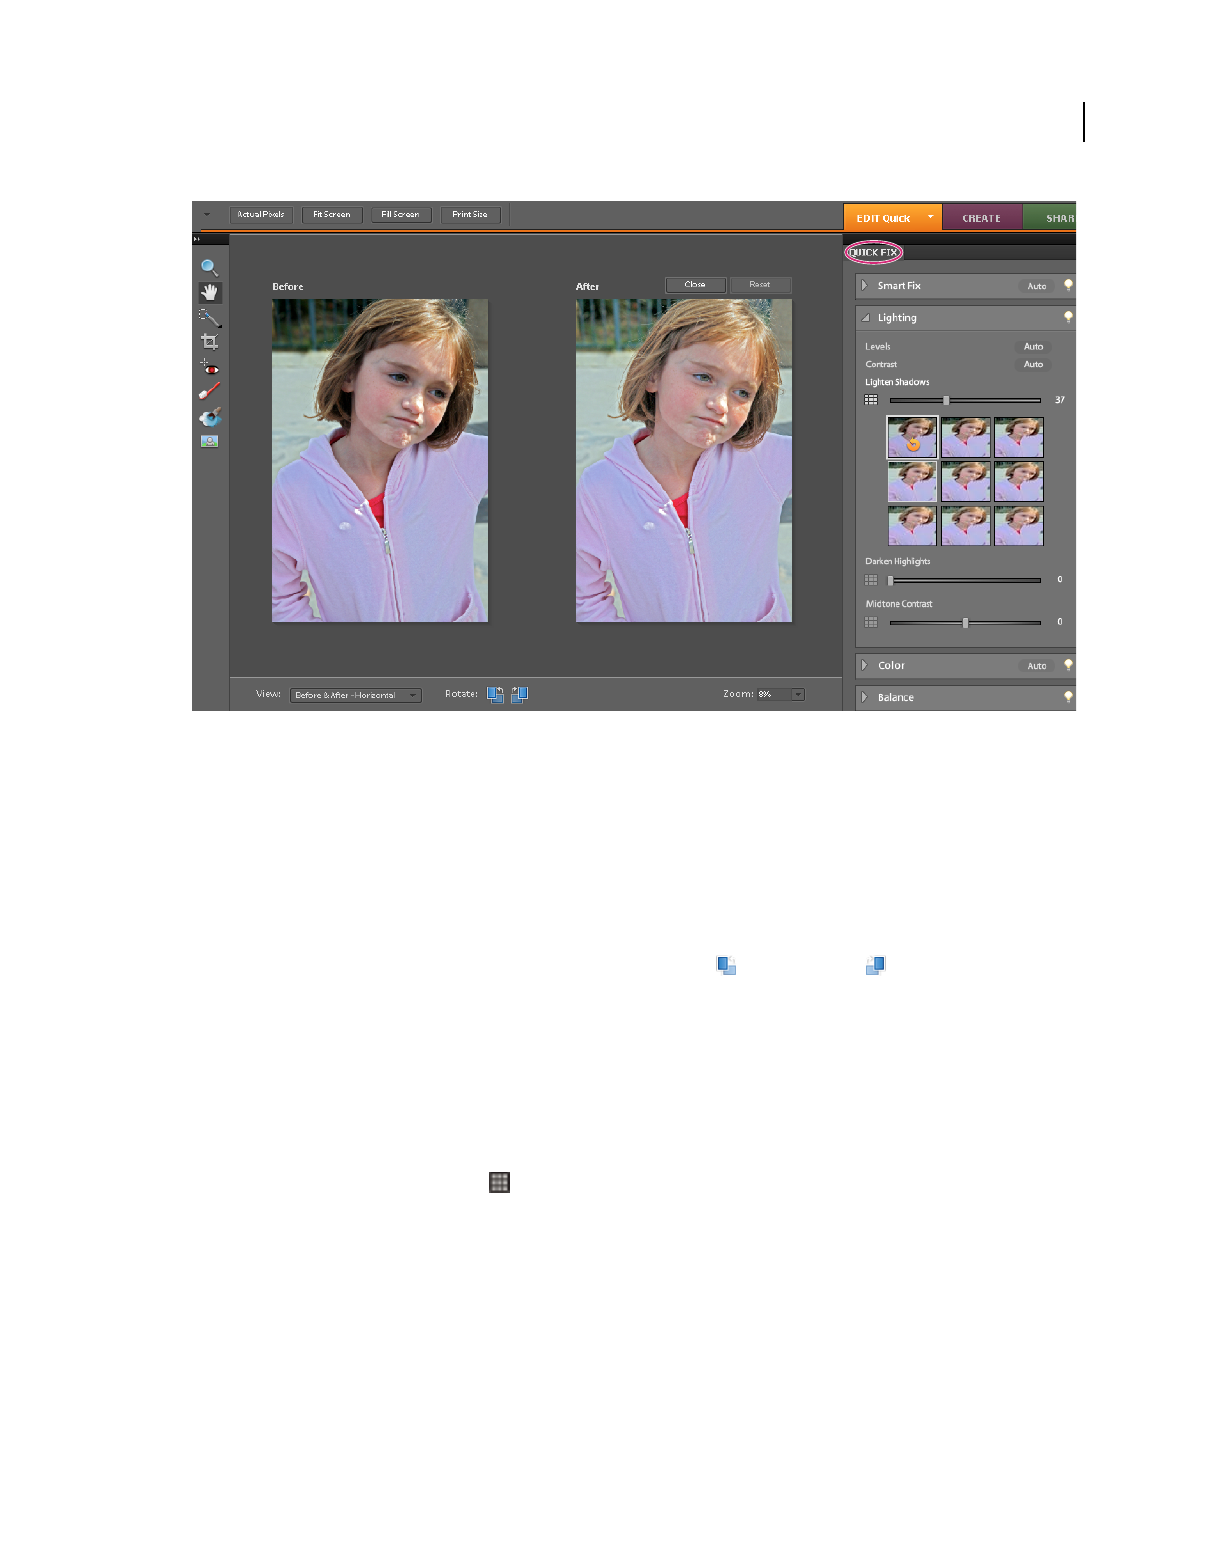
Using the Auto Lighten Shadows adjustment in Quick Fix to instantly fix a photo
1 With a photo open in the Editor, click the arrow beside Edit, and select Edit Quick.
Any photos that you have stored in the Photo Bin are accessible while you are in Quick Fix.
2
(Optional) Set preview options by making a selection from the View menu (located under the image preview). You
can set the preview to show how the photo looks before and after you make a fix, or to show both previews side by side.
3 (Optional) Use the Quick Fix tools to zoom, move, and crop the image. You can also make a selection, fix red eye,
whiten teeth, and make dull skies blue.
4 To rotate the image in 90° increments, click either the Rotate Left or Rotate Right button at the bottom of
the window.
5 Set any of the image fixing options on the right side of the window. Click the Reset button if you don’t get the result
you are looking for, and then try the other controls. If necessary, click the triangle to view the image fixing options
in a panel.
Quick Fix preview
Photoshop Elements enables you to preview how a photo looks after adjustments, before you apply the adjustment to
the image. Use Quick Fix preview icon
to preview how a photo looks after adjustments, before you apply the
adjustment to the image. For example, you can preview a color change in an image before you apply the change.
1 In the Quick Fix panel, click the Quick Fix preview icon beside the slider.
You can view thumbnails of the variations available.
2 Hover the mouse over the thumbnails to preview the adjustment on the photo.
3 Click the thumbnail to apply the adjustment on the image temporarily.
4 Click Commit to save the adjustment, or Cancel to cancel the change.
To fine-tune a picture using a preview as the starting point, click and hold the mouse button, and then drag right or left.


