259
USING PHOTOSHOP ELEMENTS 8
Making projects
Last updated 7/26/2011
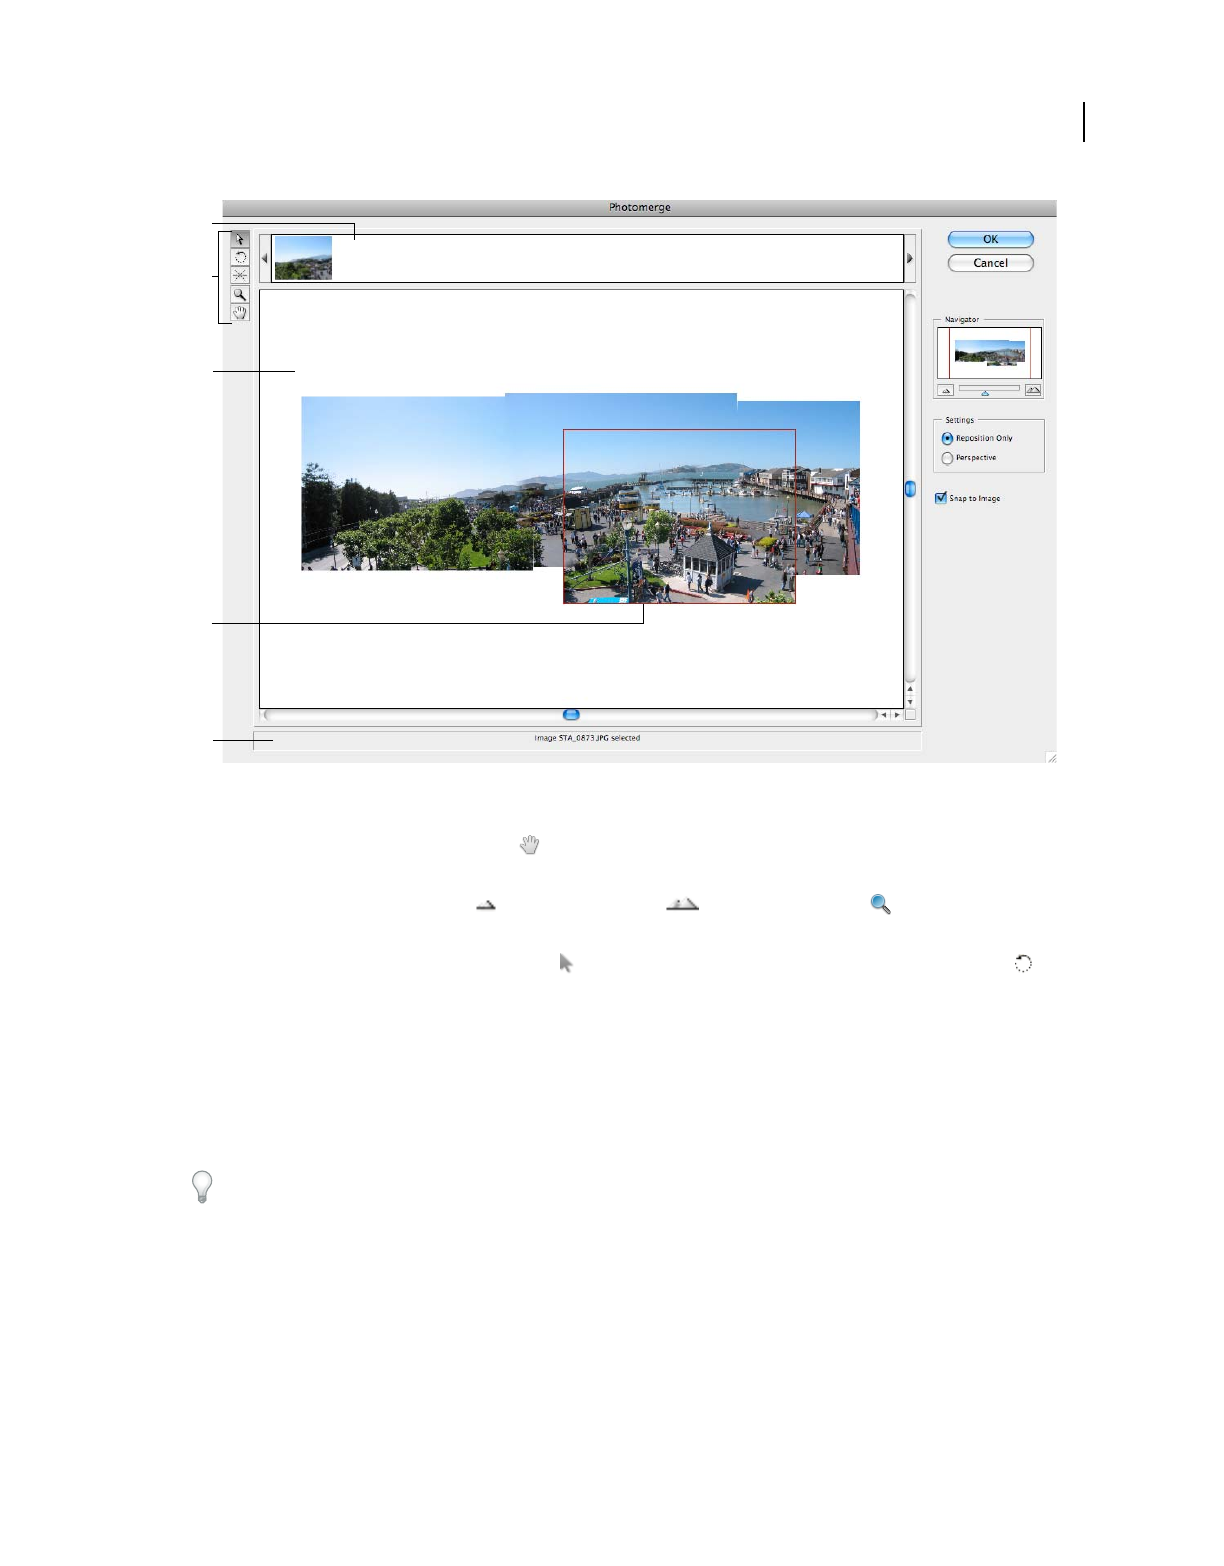
Photomerge dialog box.
A. Lightbox B. Tools C. Work area D. Selected image E. Status bar
• To navigate, select the Move View Tool and drag within the work area. Or, drag the view area (the red box) or
the scroll bar of the navigator.
• To zoom, click the Zoom In icon and Zoom Out icon , or use the Zoom tool . Hold down Option to
zoom out with the Zoom tool.
• To rotate images, select the Select Image tool , click the image you want to rotate, select the Rotate tool and
then drag in a circular motion around the image.
• To reorder images in the lightbox, select the Select Image tool and drag an image in the lightbox.
• To add an image to the composition, select the Select Image tool, and then drag the image from the lightbox to the
work area.
• To remove an image from the composition, select the Select Image tool, and then drag the image from the work
area to the lightbox.
Make sure Snap To Image is selected to automatically snap overlapping images into place when a commonality is
detected.
Change the vanishing point
The Vanishing Point tool selects the vanishing point image, which changes the perspective of the Photomerge
panorama composition.
1 Select Perspective in the Settings area of the Photomerge dialog box. The middle image is the default vanishing
point image (it has a blue border around it when selected).
A
B
C
D
E


