


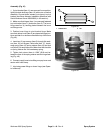


Actuator Oil Level
Under normal conditions, actuator oil level should re-
main constant. If any oil is spilled from the reservoir dur-
ing air bleeding, the oil level in the actuator should be
checked and adjusted.
1. Thoroughly clean the exterior of the actuator to pre-
vent contaminates from entering the actuator.
2. Make sure that the actuator cylinder is fully retracted.
IMPORTANT: To prevent actuator damage, use vise
with protective jaws when clamping actuator.
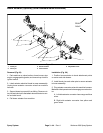
3. Place the actuator in a vise making sure that actuator
is clamped in the area identified in Figure 55. Use just
enough clamping force to hold the housing securely.
Make sure that the reservoir plug is orientated up.
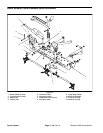
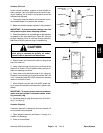
Figure 55
CYLINDER
VISE
CLAMPING
ELECTRIC
PLUG
UP
DOWN
AREA
MOTOR
RESERVOIR
RESERVOIR
CAUTION
The actuator reservoir is pressurized. If the res-
ervoir plug is removed too quickly, oil under
pressure can be ejected from the actuator.
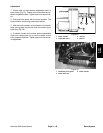
4. Slowly loosen and remove the reservoir plug at the
top of the reservoir.
5. Using a light through the plug hole, confirm that the
reservoir oil is clear. If the oil appears milky, perform ac
-
tuator air bleeding procedure.
6. Use a clean rod to identify the level of oil in reservoir.
Distance from plug fitting to oil level should be .984” (25
mm). If necessary, add ISO VG 32 mineral oil to actuator
reservoir to adjust oil level.
Spray
System
0.984”
(25 mm)
7. When oil level is correct, use a 12 volt DC power sup-
ply to power the actuator and extend the cylinder com-
pletely.
IMPORTANT: To ensure proper reservoir pressure,
make sure that cylinder is extended before instal
-
ling reservoir plug.
8. Install the reservoir plug and torque from 45 to 60 in–
lb (5.1 to 6.8 N–m).
Actuator Disposal
If actuator disposal is necessary, remove hydraulic oil
from actuator before disposal.
1. Open actuator reservoir (see Steps 1 through 4 in
Actuator Air Bleeding).
2. Drain oil from actuator.
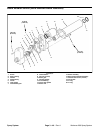
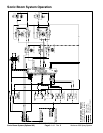
Figure 56
Workman 200 Spray System
Page 3 – 51
Rev. A
Spray System