


10-10 Firmware Version 4.6 Addendum
DD
DD
ii
ii
aa
aa
ll
ll
--
--
UU
UU
pp
pp
NN
NN
ee
ee
tt
tt
ww
ww
oo
oo
rr
rr
kk
kk
ii
ii
nn
nn
gg
gg
ff
ff
oo
oo
rr
rr
VV
VV
PP
PP
NN
NN
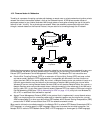
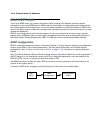
Microsoft Windows Dial-Up Networking software permits a remote standalone workstation to establish a VPN
tunnel to a PPTP server such as a Netopia R310 located at a central site. Dial-Up Networking also allows a
mobile user who may not be connected to a PAC to dial into an intermediate ISP and establish a VPN tunnel to,
for example, a corporate headquarters, remotely. Netopia Routers also can serve as a PAC at the workstation's
site, making it unnecessary for the standalone workstation to initiate the tunnel. In such a case, the Dial-Up
Networking software is not required, since the Netopia R310 initiates the tunnel.
This section is provided for users who may require the VPN client software for Dial-Up Networking in order to
connect to an ISP who provides a PPTP account.
Microsoft Windows Dial-Up Networking (DUN) is the means by which you can initiate a VPN tunnel between your
individual remote client workstation and a private network such as your corporate LAN via the Internet. DUN is a
software adapter that allows you to establish a tunnel.
DUN is a free add-on available for Windows 95, and comes standard with Windows 98 and Windows NT. The
VPN tunnel behaves as a private network connection, unrelated to other traffic on the network. Once you have
installed Dial-Up Networking, you will be able to connect to your remote site as if you had a direct private
connection, regardless of the intervening network(s) through which your data passes. You may need to install
the Dial-Up Networking feature of Windows 95, 98, or 2000 to take advantage of the virtual private networking
feature of your Netopia R310.
Note: For the latest information and tech notes on Dial-Up Networking and VPNs be sure to visit the Netopia
website at http://www.netopia.com and, for the latest software and release notes, the Microsoft website at
http://www.microsoft.com.
II
II
nn
nn
ss
ss
tt
tt
aa
aa
ll
ll
ll
ll
ii
ii
nn
nn
gg
gg
DD
DD
ii
ii
aa
aa
ll
ll
--
--
UU
UU
pp
pp
NN
NN
ee
ee
tt
tt
ww
ww
oo
oo
rr
rr
kk
kk
ii
ii
nn
nn
gg
gg
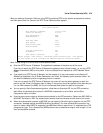
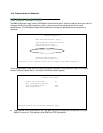
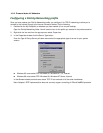
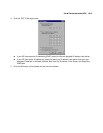
Check to see if Dial-Up Networking is already installed on your PC. Open your My Computer (or whatever you
have named it) icon on your desktop. If there is a folder named Dial-Up Networking, you don’t have to install it.
If there is no such folder, you must install it from your system disks or CDROM. Do the following:
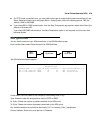
1. From the Start menu, select Settings and then Control Panel.
2. In the Control Panel window, double-click the Add/Remove Programs icon.
The Add/Remove Programs Properties window appears.
3. Click the Windows Setup tab.
4. Double-click Communications.