


7-4 User’s Reference Guide
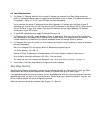
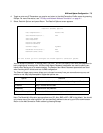
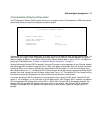
6. Select Telco Options and press return. the Telco Options screen appears.
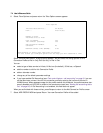
Select Dial and press Return. A pop-up menu appears. You can select the dialing options for this
Connection Profile as Dial In Only, Dial Out Only, or Dial In/Out.
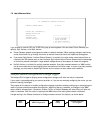
You can:
■ select a type of data service to initiate, 64 kb/sec (the default), 56 kb/sec, or Speech
■ add the number to dial for this Connection Profile
■ add an alternate number
■ change any of the default parameter settings
■ if you have enabled Call Accounting (see “Cost control feature -- call accounting” on page 8-1) you can
set the Maximum connect time for this connection profile by entering the hours and minutes in
HH:MM format. When aggregate usage for this profile reaches this threshold, the profile becomes tem-
porarily disabled until the limit is raised or the counters are reset (see “Viewing call accounting statis-
tics” on page 8-2). If Call Accounting is not enabled, this field does not appear.
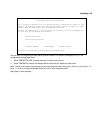
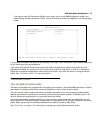
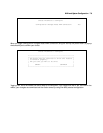
When you are finished with these entries, press Escape to return to the Add Connection Profile screen.
7. Select ADD PROFILE NOW and press Return. Your new Connection Profile will be added.
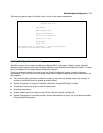
Telco Options
Initiate Data Service... 64 kb/sec
Dial... Dial In/Out
Number to Dial:
Alternate Site to Dial:
Dial on Demand: Yes
Idle Timeout (seconds): 300
CNA Validation Number:
Callback: No
Maximum connect time (HH:MM): 0:00
Return/Enter to select data rate/class of service.
In this Screen you configure options for the ways you will establish a link.