


WAN and System Configuration 7-1
CC
CC
hh
hh
aa
aa
pp
pp
tt
tt
ee
ee
rr
rr
77
77
WW
WW
AA
AA
NN
NN
aa
aa
nn
nn
dd
dd
SS
SS
yy
yy
ss
ss
tt
tt
ee
ee
mm
mm
CC
CC
oo
oo
nn
nn
ff
ff
ii
ii
gg
gg
uu
uu
rr
rr
aa
aa
tt
tt
ii
ii
oo
oo
nn
nn
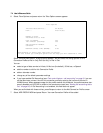
This chapter describes how to use the console-based management screens to access and configure advanced
features of your Netopia R310 ISDN Router. You can customize these features for your individual setup. These
menus provide a powerful method for experienced users to set up their router’s connection profiles and system
configuration.
This section covers the following topics:
■ “Creating a new Connection Profile” on page 7-1
■ “The Default Profile” on page 7-5
■ “The Default Profile” on page 7-5
■ “System Configuration screens” on page 7-10
■ “System Configuration features” on page 7-11
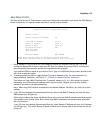
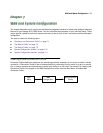
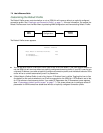
Creating a new Connection Profile
Connection Profiles define the telephone and networking protocols necessary for the router to make a remote
connection. A Connection Profile is like an address book entry describing how the router is to get to a remote
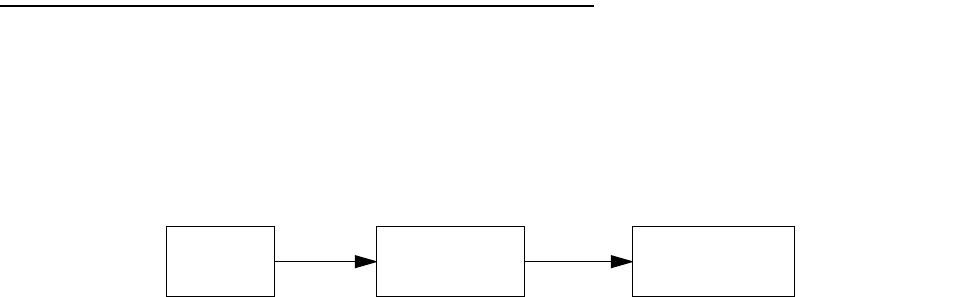
site, or how to recognize and authenticate a remote user dialing in to the router. For example, to create a new
Connection Profile, you navigate to the WAN Configuration screen from the Main Menu, and select Add
Connection Profile.
Main
Menu
WAN
Configuration
Add Connection
Profile