


Installation and Configuration 89
3.9 Put SNMP Changes into Effect
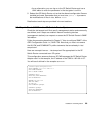
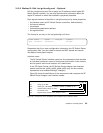
To have changes to /etc/snmpd.conf take effect, kill snmpd. It will be
automatically restarted.
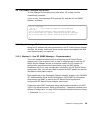
Log in as root, find the snmpd PID (process ID), and then kill the SNMP
daemon, as follows:
3.10 Step 2. Assign IP Addresses
Assign an IP address and other parameters to the SP Switch Router Adapter
interface. As already mentioned, there are two ways to accomplish this task
(one recommended, one optional).
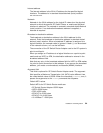
3.10.1 Method 1: Use SP SNMP Manager - Recommended
This is the method recommended for configuring the SP Switch Router
Adapter card. From a system point of view, it is appropriate to treat the SP
Switch Router Adapter card as an extension node in the SP system. All
configuration parameters should be entered using the SMIT panels.
Remember that if you enter configuration information into SP Switch Router
configuration files, you will also need to access the SMIT panels and reenter
information those panels require.
Refer specifically to the "Managing Extension Nodes" chapter in the
RS/6000
SP: Administration Guide Version 2 Release 4,
GC23-3897 for information
about setting up SNMP to monitor the SP Switch Router system and
configure the SP Switch Router Adapter media card.
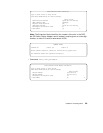
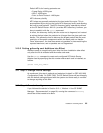
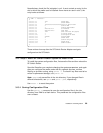
Following are the SMIT commands along with the data entered for the GRF
1600 in our lab environment. Refer to Appendix A, “Laboratory Hardware and
Software Configuration” on page 233 for detailed information about our setup.
• Command:
smitty enter_extnode
# ps -ax | grep snmpd
326 00- S 0:00.17 snmpd /etc/snmpd.conf /var/run/snmpd.NOV
# kill 326
# Jun 13 16:13:18 grf16 mib2d[397]: mib2d: terminated by master agent
Jun 13 16:13:18 grf16 root: grstart: snmpd exited status 143; restarting.
Jun 13 16:13:18 grf16 root: grstart: mib2d exited status 0; restarting.
#