


6-14 Replacing the Lamp Technobeam
®
User Manual
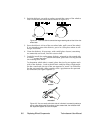
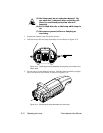
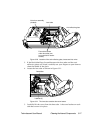
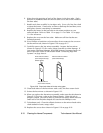
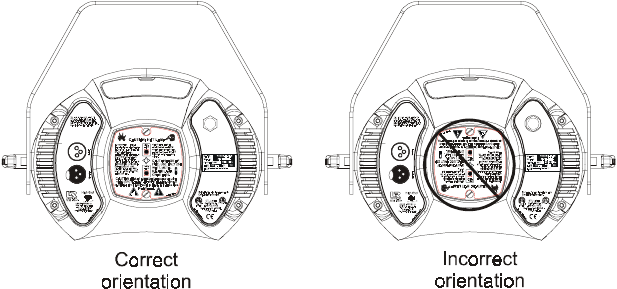
Figure 6-17. You can look at the lamp label text to make sure the lamp plate
is oriented correctly; incorrect orientation can result in damage to the fixture
and the lamp.
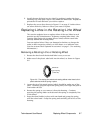
9. As you insert the lamp assembly, be careful not to crimp or trap the
lamp wires and make sure the lamp is inserted into the reflector.
10. Firmly tighten the two lamp assembly screws to secure the assembly to
the fixture.
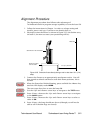
Optimizing the Lamp
You should optimize the lamp after you replace the lamp, or if you
notice a “hot spot” of brightness anywhere other than the center of the
light beam.
The optimization procedure below describes how to optimize the lamp
using the fixture’s onboard menu system. However, you can access the
same options using your DMX controller.
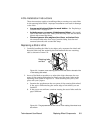
1. Orient the fixture so that the beam will project onto a flat, white
surface at least 10 feet (3 m) away.
2. Turn the lamp on (see “Turning the Lamp On or Off (LAMP)” on page
3-20).
3. If necessary, set any lithos, colors, or effects values to “0” to achieve an
open, white beam.
4. Make sure that the light beam is round and not oval. If necessary,
adjust the pan and tilt construct values until the beam is round (see
“Positioning the Mirror” on page 4-6).
5. Adjust the focus until the edge of the light beam is sharp (see
“Refocusing the Fixture” on page 4-7).