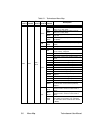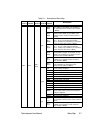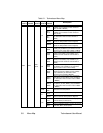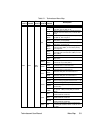
3-2 Menu System Overview Technobeam
®
User Manual
Menu System Overview
The Technobeam menu system allows you to:
• Configure your fixture for operation (discussed in Chapter 2)
• Access fixture options such as homing the fixture, crossloading
software, and performing self tests (discussed in this chapter)
• Use preset programming to create, store, and play back scenes
from the fixture’s onboard memory (see Chapter 4)
Navigation Buttons
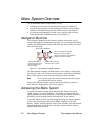
The navigation buttons on the fixture’s display panel allow you to
navigate through the onboard menu system. As you navigate the menu
system, the alphanumeric display will show the menu items you select
from the menu map.
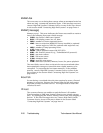
Figure 3-1. Technobeam navigation buttons.
The alphanumeric display will flash when a new option is
selected
(by
pressing the <Up> and <Down> arrow buttons), and will stop flashing
when a new option is
entered
(by pressing the <Enter> button).
Note
If you do not press the <Enter> button, the new option
you selected will not be stored.
Pressing the <Menu> button returns you to the previous option or
menu
without changing
the value of an option.
Accessing the Menu System
To access the menu system, press and hold the <Menu> key until
“ADDR” appears on the LED display. The menu system is protected
against inadvertent menu changes by requiring the <Menu> button to
be held for a few seconds before allowing entry to the menus.
To exit the menu system, you must keep pressing the <Menu> button
to back out of each menu level until “MENU” appears on the LED
display. “MENU” will be replaced, after a few seconds, with the default
alternating display of the fixture’s software version and the fixture
number/DMX start channel.
<Up> arrow button: scroll upward
through menu items or options
<Down> arrow button: scroll downward
through menu items or options
<Menu> button: move up
to the previous menu level
(press and hold to enter
the menu system)
<Enter> button: select the
curent menu item or option
MENU ENTER
alphanumeric LED display


