


ProSecure Unified Threat Management UTM10 or UTM25 Reference Manual
Virtual Private Networking Using IPsec Connections 7-11
v1.0, September 2009
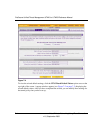
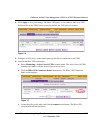
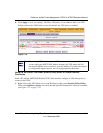
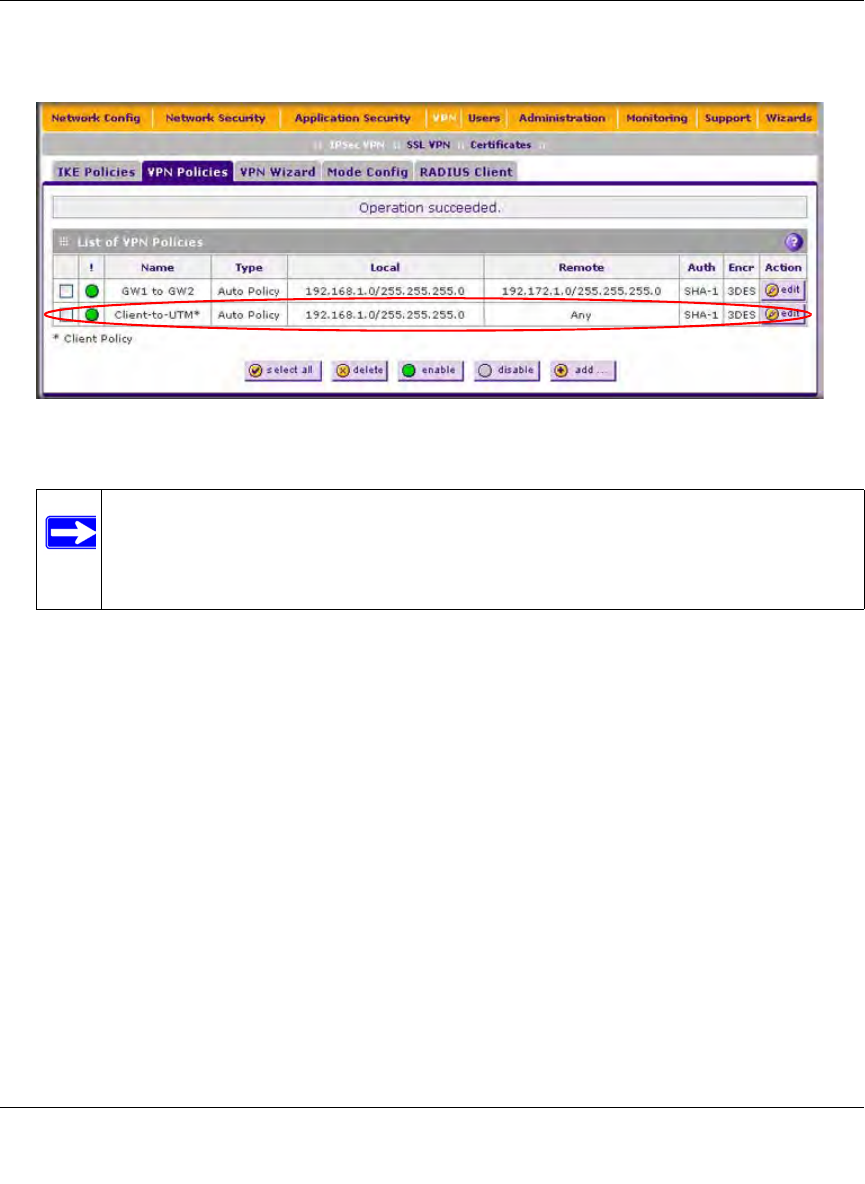
4. Click Apply to save your settings. The IPsec VPN policy is now added to the List of VPN
Policies table on the VPN Policies screen. By default, the VPN policy is enabled.
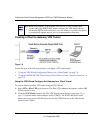
Using the NETGEAR VPN Client Security Policy Editor to Create a Secure
Connection
From a PC with the NETGEAR ProSafe VPN Client installed, configure a VPN client policy to
connect to the UTM:
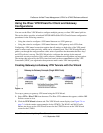
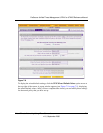
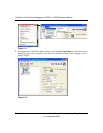
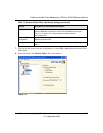
1. Right-click on the VPN client icon in your Windows toolbar, select Security Policy Editor.
Then, select Options > Secure, and verify that the Specified Connections selection is enabled
(see Figure 7-11 on page 7-12).
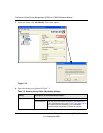
Figure 7-10
Note: When using FQDNs, if the dynamic DNS service is slow to update their
servers when your DHCP WAN address changes, the VPN tunnel will fail
because the FQDNs do not resolve to your new address. If you have the option
to configure the update interval, set it to an appropriately short time.