


ProSecure Unified Threat Management UTM10 or UTM25 Reference Manual
7-16 Virtual Private Networking Using IPsec Connections
v1.0, September 2009
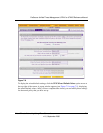
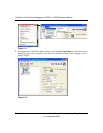
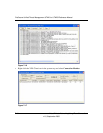
9. Enter the settings as explained in Table 7-6.
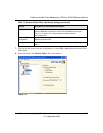
10. Click on the disk icon to save the configuration, or select File > Save from the Security Policy
Editor menu
11. Close the VPN ProSafe VPN client.
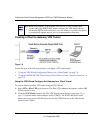
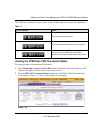
Testing the Connections and Viewing Status Information
Both the NETGEAR ProSafe VPN Client and the UTM provide VPN connection and status
information. This information is useful for verifying the status of a connection and troubleshooting
problems with a connection.
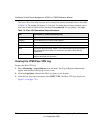
Testing the VPN Connection
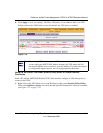
To test a client connection and view the status and log information, follow these steps.
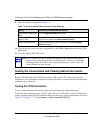
To test the client connection, from your PC, right-click on the VPN client icon in your Windows
toolbar, and then select the VPN connection that you want to test. In the example that is shown in
Figure 7-15 on page 7-17, select Connect... > My Connections\UTM_SJ.
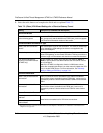
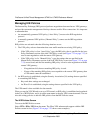
Table 7-6. Security Policy Editor: Security Policy Settings
Setting Description (or Subfield and Description)
Select Phase 1 Negotiation
Mode
Select the Aggressive Mode radio button.
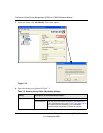
Enable Perfect Forward
Secrecy (PFS)
Select the Enable Perfect Forward Secrecy (PFS) checkbox. From the
pull-down menu below, select Diffie-Hellman Group 2.
Enable Replay Detection Leave the default setting, which is selection of the Enable Replay
Detection checkbox.
Note: You do not need to open or change the settings on the Authentication (Phase 1)
screen or its accompanying Proposal 1 and Proposal 2 screens, nor on the Key
Exchange (Phase 2) screen or its accompanying Proposal 1 screen. Leave the
default settings for these screens.