


ACU-RITE 3500i 5
1.1 The 3500i
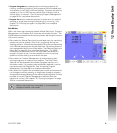
Writing Programs
The 3500i allows many features to be used without having to write a
program. But for operations that repeat or complex machining it is best
to write a program. Before you start to write a program, determine the
work-holding device and the location of Part Zero (the point to which
all movement is referenced). Since absolute positions are defined
from Part Zero, try to select a location that directly corresponds to
dimensions provided on the part print, such as the lower left corner of
the work. Then, you can develop a program using a procedure similar
to the one that follows:
The first block of a program is a safe starting position. This is where
the tool-change position (a location away from the work area where
the axes can return for safe tool changing) is input. The first block
includes the units of measurement (Inch/MM), mode of operation
(Absolute), move type (Rapid), and to cancel all auxiliary functions
(Tool Offsets, Spindle, and Coolant). This is the same as in g-code
(e.g. typical first blocks: G70, G90, G0, G28, Z0, & M5). Refer to
chapter 11 "G-Code on page 364”.
Subsequent blocks in the program set Spindle information, call Tool
number, turn on Coolant, and make the initial move toward the
work.
The remaining blocks in the program describe the required moves,
Canned Cycles, and Tool changes to complete the machining.
The next to the last block in the program returns the axes to the Tool
change position, turning off any auxiliary functions (Tool Offsets,
Spindle, and Coolant). The last block , EndMain, (M2) ends the
program. This is the same as in g-code (e.g. typical last blocks: M5,
G0, T0, X0, Y0, Z0, M9; M2). Refer to chapter 11 "M-Code List on
page 368”.
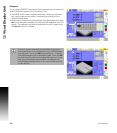
After writing a program, verify it. Run it in Draw Mode to troubleshoot
for errors. Verify that all programmed moves are safe, and accurate
to the part print dimensions.
Load the stock material into the selected work-holding device.
Set the Tool Offsets for each tool in the Tool Page.
Before running the part in the Auto Mode, run it in Single-Step Mode
to verify that both the program and the setting of Tool Offsets have
been correctly completed. Single-Step Mode allows you to execute
the program block-by-block.
After testing the program, make any necessary corrections.
When the finished program is ready for production, back it up on a
USB memory device.