


8-3
Chapter 8 SXYX
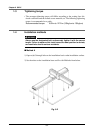
■ Method B
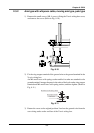
1) Tap M6 coarse screw thread holes into the installation base where the robot is
to be installed.
Refer to the XY-X Series catalog for the hole positions.
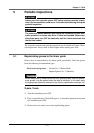
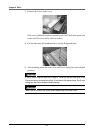
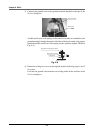
2) Remove the countersunk head screws (M4, 5 screws) fixing the X-axis stroke
cover.
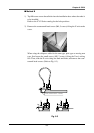
When using the whipover cable for the arm type, pole type or moving arm
type, first loosen the small screws (M5, 2 screws) fixing the X-axis wiring
box. Then, slide the X-axis wiring box back and forth, and remove the coun-
tersunk head screws. (Refer to Fig. 8-3.)
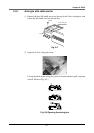
Loosen (M5 small screw × 2 screws)
Fig. 8-3