


12-25
Chapter 12 HXYLX
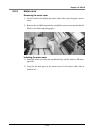
5-4 Replacing the motor (X-axis)
!
CAUTION
Since a positional shift occurs after replacing the motor, return-to-origin must
be performed again and the point data re-specified. When removing the parts,
check and mark the part positions versus each other so you can correctly reas-
semble the parts later.
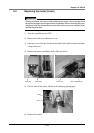
1) Turn the controller power OFF.
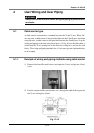
2) Remove the belt cover and motor cover.
3) Open the cover of the box fixed onto the table slide, and disconnect the motor
wiring connector.
4) Remove the motor installation bolts (M6: four bolts).
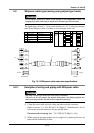
Wiring box Motor cable Motor cover Motor installation bolt
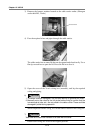
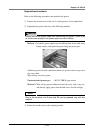
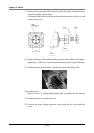
5) Pull the belt off the pulley. (Refer to the following photograph.)
Pulley
Belt
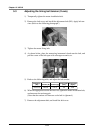
6) Remove the motor.