


8-11
Chapter 8 SXYX
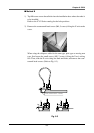
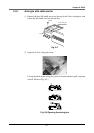
3 Installing the Tool
WARNING
Always turn the controller power OFF before Installing a tool to prevent
an accident.
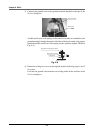
WARNING
Before installing a tool, check that the robot is securely fixed to the base.
WARNING
The user is responsible for determining the required bolt type and tight-
ening torque, and accurately installing the tool. Improper installation can
cause the tool to dislocate during operation and lead to serious accidents.
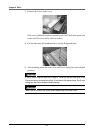
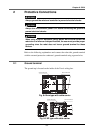
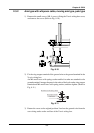
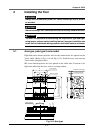
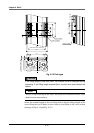
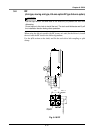
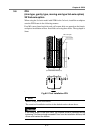
3-1 Arm type, pole type 2-axis model
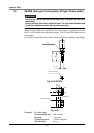
Eight M6 coarse thread tap holes and two φ6 reamer holes are opened on the
Y-axis slider. (Refer to Fig. 8-14 and Fig. 8-15.) Install the user tool onto the
Y-axis slider using these holes.
M5 coarse thread tap holes are also opened on the slider side. Use these to fix
light loads other than the tool, such as a wiring retainer.
70
110
(Tolerance between knock (0.02)
90
32
135
8-M6×1.0 Depth8
2-φ6H7 Depth8
6 (Thread insert depth)
90
2020
8 (Allowable screw depth)
50
19
23.5
4-M5×0.8 Depth7
Fig. 8-14 Arm type