


DR4300 Circular Chart Recorder
126 DR4300 Circular Chart Recorder Product Manual 12/03
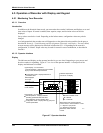
4.4.4.5 Startup procedure
Procedure
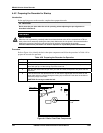
Use the procedure listed in Table 4-25 to start the recorder.
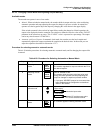
Open the recorder door (if the recorder does not have the optional keypad on the outside of the door).
Apply power and wait for the recorder to run its power-up tests.
ATTENTION
If FAILSF or another error message starts blinking in the lower display, refer to Section 8 for
troubleshooting information.
For recorders with control on both pens, be sure the INP ‘1’ indication is lit for steps 2 to 6. If INP 1
is not lit, press the FUNC
key until “1” is lit when “INP” is displayed.
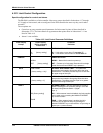
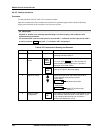
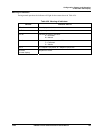
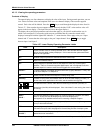
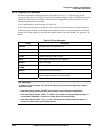
Table 4-25 Procedure for Starting the Recorder
Step Operation Press Action/Result
1
Pen check For models without outputs, check that the pen is
operating and skip to Step 4.
2
Select manual
mode
MAN
AUTO
RESET
Until “M” indicator is ON. Be sure INP 1 indicator is lit.
If it is not, press FUNC
key. The recorder is in
manual mode and the Output (OT) in percent is
displayed in the lower display.
DISP
Calls up OT value in the lower display.
3
Adjust the output
or
Adjust the output value and ensure that the final
control element is functioning correctly.
Upper Display
shows the input value.
Lower Display
shows OT and the output
value in %.
4
Confirm correct
configuration.
SET
UP
If you want to check the recorder’s configuration, follow
the procedure described earlier in this section. If you
try to change a value and can not, a lockout is
enabled; see Subsection 4.3.19.