Installation
12/03 DR4300 Circular Chart Recorder Product Manual
21
2.3.5 Mounting on Surface (of Panel or Wall)
Procedure
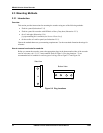
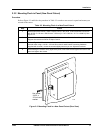
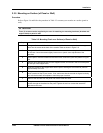
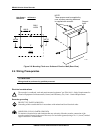
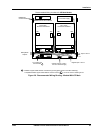
Refer to Figure 2-6 and follow the procedure in Table 2-5 to mount your recorder on a surface (panel or
wall).
ATTENTION
Three (3) screws must be supplied by the user for attaching the mounting hardware (brackets and
support hook) to panel or wall.
Table 2-5 Mounting Flush on a Surface (of Panel or Wall)
Step Action
1
Using two flat-head 10-32 x 1/4-inch screws supplied with the recorder, fasten the support
hook into the recess at the back of the recorder case as shown in Figure 2-6.
2
Using 1/4-20 x 1/2-inch hex screws and lockwashers, attach a mounting bracket to each side
of the case. Leave the screws slightly loose so as to permit some adjustments of the
brackets.
3
On the panel, mark the locations for the three holes, as shown by the hole pattern in Figure
2-6.
4
Using a drill of appropriate size for user-supplied screws, drill a hole in the front of the panel
for the eye of the support hook.
5
Insert the screws for the support hook into the panel, allowing the screw head to protrude
approximately 5/16-inch.
6
Hang the recorder support hook on the screw. Make sure that the locations for the other two
holes (marked in Step 3) are correct. If not, make sure that the recorder is aligned vertically,
and use the brackets as templates to mark the proper locations.
7
Remove the recorder from the panel and drill the other two holes.
8
Hang the recorder on the screw by the support hook and insert the other two user-supplied
screws through the brackets into the panel. Tighten the two hex screws that attach the
brackets to the case.


