Return to Section TOC Return to Section TOC Return to Section TOC Return to Section TOC
Return to Master TOC Return to Master TOC Return to Master TOC Return to Master TOC
TROUBLESHOOTING & REPAIR
F-36 F-36
COMMANDER 400
SHUTDOWN SOLENOID TEST (continued)
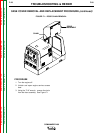
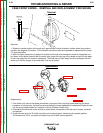
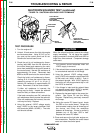
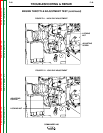
FIGURE F.9 - SHUTDOWN SOLENOID LEAD TERMINALS
PULL-IN COIL
(LARGER TERMINALS
EACH SIDE
#225 AND #262)
HOLD-IN COIL
(SMALLER TERMINALS
EACH SIDE
#224 AND #240)
IDLER
SOLENOID
SHUTDOWN
SOLENOID
TEST PROCEDURE
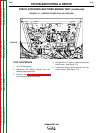
1. Turn the engine off.
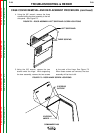
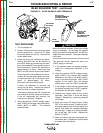
2. Unlatch, lift and secure the right side engine
service access door. Using a 5/16” nut dri-
ver, open up the control panel and tilt out.
Remove the control board cover
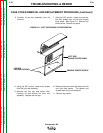
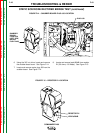
3. Check the pull-in coil resistance by discon-
necting lead #262 from the B2 terminal at
the control board and measuring the resis-
tance from lead #262 to the ground screw at
the control board. Normal coil resistance is
approximately 0.4 ohms. Reconnect lead
#262 to the B2 terminal at the control board.
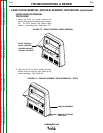
Check the hold-in coil resistance by discon-
necting J3 & J4 from the control board and
measuring across J3 pin 2 to J4 pin 5.
Normal coil resistance is approximately 20
ohms. Reconnect J3 at the control board.
If either coil resistance is incorrect, the
wiring may be faulty. Inspect the solenoid
leads for faulty or loose connections.
If the lead connections are OK, recheck the
coil resistances directly across the solenoid.
If the coil resistances are incorrect, the sole-
noid may be faulty. Replace.
4. Using the external 12VDC voltage supply,
apply 12VDC to the larger shutdown sole-
noid terminals (#262+ to #225-). The sole-
noid should activate.
When the solenoid activates, remove the voltage
supply immediately. Do not leave the external
supply connected to terminals #262 and #225 for
longer than three seconds. Component damage
could result.
The solenoid should deactivate when the
12VDC supply is removed.
5.
If the solenoid does not operate properly, check
for a mechanical restriction in the linkage.
6.
Using the external 12VDC voltage supply,
apply 12VDC to the smaller solenoid terminals
for the hold-in coil, (#240+ to #224-). Push in
the solenoid plunger. With 12VDC applied to
the hold-in coil, the plunger should stay in until
the 12VDC is removed.
7.
If the linkage is intact and the solenoid does
not operate correctly when 12VDC is applied,
the solenoid may be faulty. Replace.
8. Replace the harness leads to the correct ter-
minals. See Figure F.9 and the Wiring
Diagram. Replace any previously removed
wire wraps.
8a. Using the control PC board layout, locate
the Q25 on the control board. Scrape the
environmental coating from all three legs of
the device, and check the resistance
between all three legs. If there is continuity
between any of the legs, Q23 is bad.
Replace the control PC board.
9. Close and secure the right side engine ser-
vice access door. Replace the control board
cover and close the control panel.
CAUTION


