


F-62
TROUBLESHOOTING AND REPAIR
F-62
POWER WAVE 455/POWER FEED 10
INSTALLATION
1. If a new solenoid is to be installed, it
may be necessary to remove the hose
fitting from the “old” solenoid and install
it into the new solenoid using the 1/2 in.
wrench.
2. Place the gas solenoid into the wire
feeder and secure it to the rear case
panel using the two 5/16 in. mounting
screws.
3. Install the gas hose onto the solenoid.
4. Connect the two electrical leads to the
gas solenoid.
5. Install the external brass fitting onto the
gas solenoid using the 3/4 in. wrench.
6. Install the wire feeder cover with the 3/8
in. nutdriver.
PROCEDURE
1. Remove input power to the wire feeder.
2. Using the 3/8 in. nutdriver, remove the
cover from the wire feeder.
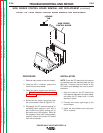
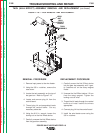
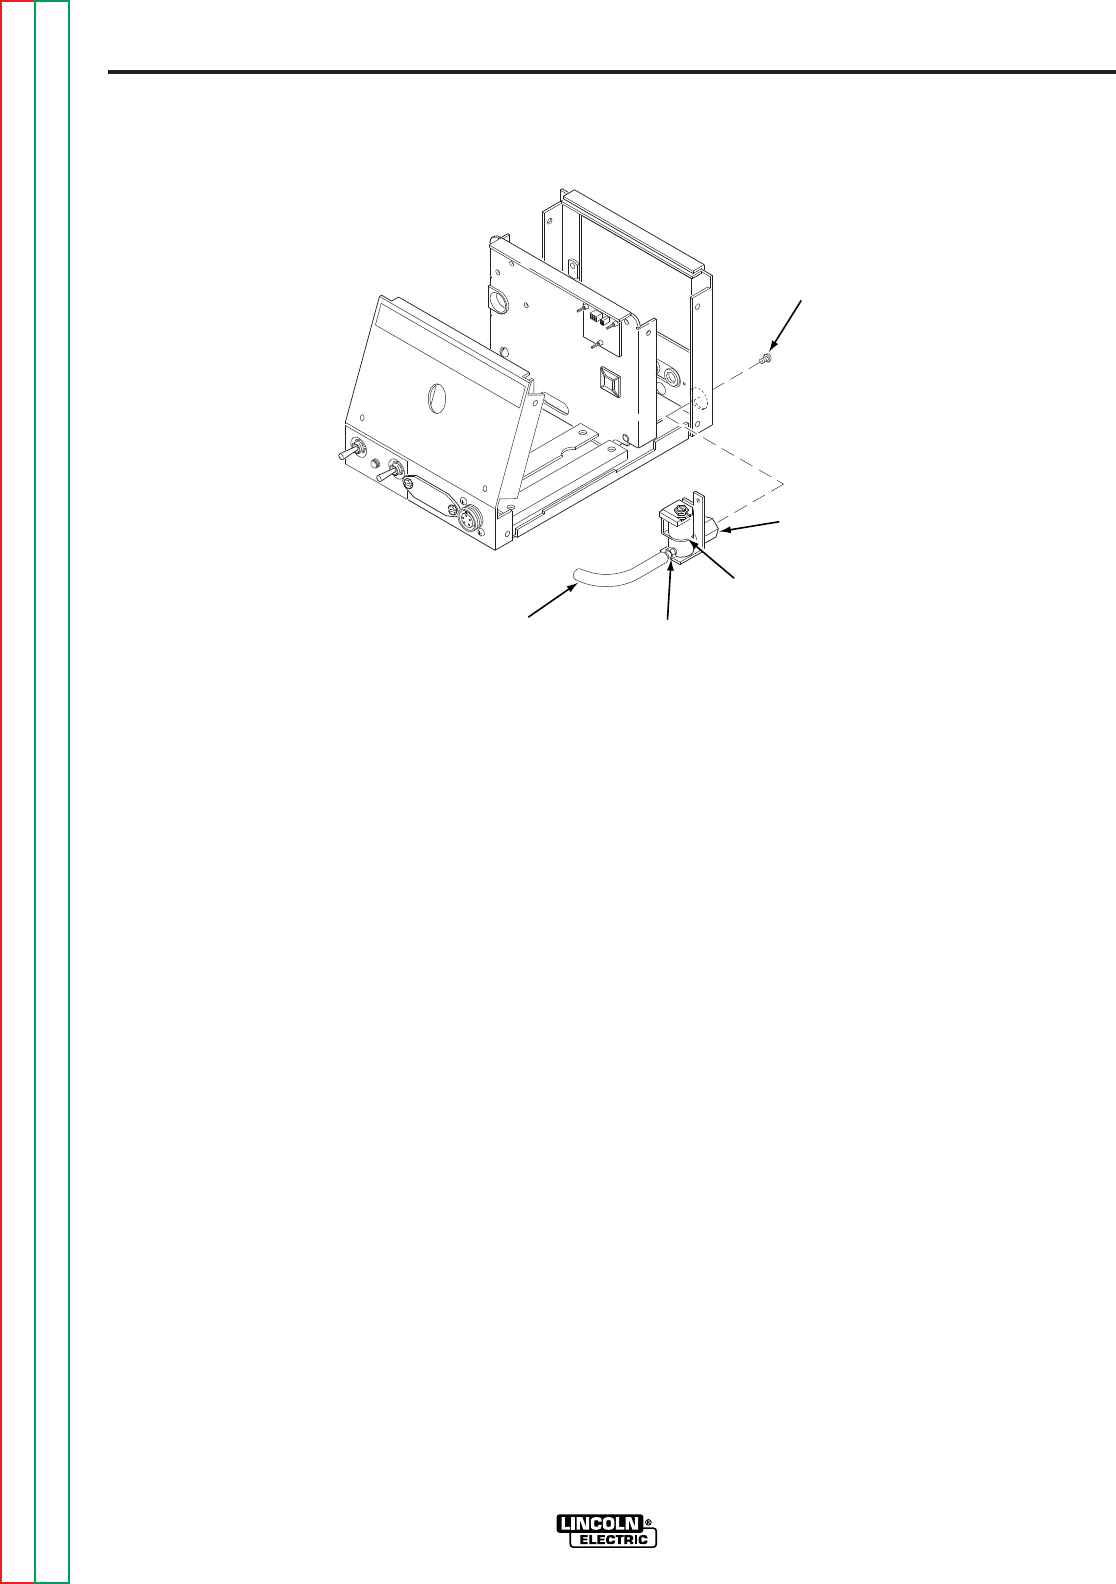
3. Locate the gas solenoid on the rear
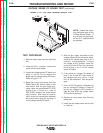
panel of the wire feeder. Refer to
Figure F.17.
4. Using the 3/4 in. wrench, remove the
external brass fitting.
5. Carefully remove the two leads from
the solenoid.
6. Remove the gas hose from the sole-
noid.
7. Using the 5/16 in. nutdriver, remove the
two screws mounting the solenoid to
the rear case panel.
8. Carefully remove the gas solenoid from
the wire feeder.
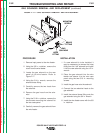
FIGURE F.17 — GAS SOLENOID REMOVAL AND REPLACEMENT.
MOUNTING
SCREW
GAS
HOSE
HOSE
FITTING
BRASS
FITTING
GAS
SOLENOID
GAS SOLENOID REMOVAL AND REPLACEMENT
(continued)
Return to Section TOC Return to Section TOC Return to Section TOC Return to Section TOC
Return to Master TOC Return to Master TOC Return to Master TOC Return to Master TOC