


7-14
Cisco 12000/10700 v3.1.1 Router Manager User Guide
OL-4455-01
Chapter 7 Interface Profiles
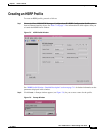
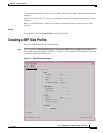
Creating a POS Interface Profile
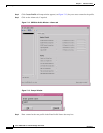
Step 4 Click Ok. The POS Profile window reappears with the new profile name displayed in the POS Profile
list at left of the window.
Note Choose the Edit > Copy and Edit > Copy Page Configuration to copy and paste
between different profiles. This is useful when you wish to copy configuration
information from one profile to the next.
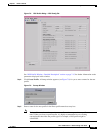
Step 5 Configure the parameters displayed in the General, SONET Overhead, Alarm Reporting & Threshold,
and Alarm Reporting areas, as required.
Note You can apply an existing profile to a new profile to save time when configuring
new profiles. Choose Edit > Apply Profile and then choose the existing profile you
wish to apply from the profiles listed. The configuration settings are copied from
the existing profile to the new profile. The settings copied appear in blue.
Step 6 Choose File > Save to save the parameters you have selected for your profile.
Step 7 Choose File > Close to close the window.
Note You have now created a profile for the POS Interface. Proceed to the “POS
Interface Configuration” section on page 8-15 for details on applying the profile
and configuring the interface.
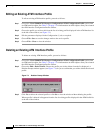
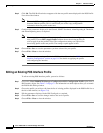
Editing an Existing POS Interface Profile
To edit an existing POS Interface profile, proceed as follows:
Step 1 Choose the Cisco 12000/10720 Manager>Configuration>POS>Configuration Profile option from a
POS interface object. See Table 7-2 on page 7-2 for information on which objects allow you to launch
the POS Profile Dialog window.
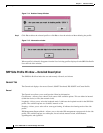
Step 2 Choose the profile you wish to edit from the list of existing profiles displayed in the POS Profile list at
the left of the window (see Figure 7-8).
Step 3 Edit the parameters displayed in the POS Config tab, as required.
Step 4 Choose File > Save to save the changes made to the service profile.
Step 5 Choose File > Close to close the window.