


Workman HD SeriesPage 7 − 32Chassis
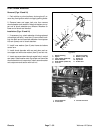
Front Shock Absorber
Removal (Figs. 23 and 24)
1. Park vehicle on a level surface, shut engine off, re-
move key from ignition switch and apply parking brake.
2. Remove lower and upper lock nuts, then remove
shock absorber and washers. Note that washers on up-
per end of shock absorber are different. Washers on
lower end of shock are identical.
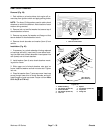
Installation (Figs. 23 and 24)
1. If necessary (e.g. shock absorber is being replaced
or bushings are worn), insert two (2) new rubber bush-
ings into each end of new shock absorber. Insert spacer
into ram (lower) end of shock absorber.
2. Install inner washer (item 3) onto frame stud above
control arm.
3. Install shock absorber with ram end down and se-
cure upper end with outer washer (item 5) and lock nut.
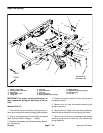
4. Insert cap screw down through angled hole in control
arm tower. Install washer onto cap screw and then slide
shock absorber onto cap screw. Install second washer
onto cap screw and secure with lock nut.
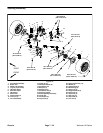
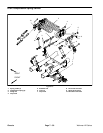
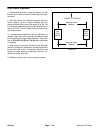
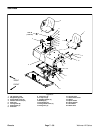
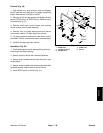
Figure 23
1. Rubber bushing
2. Spacer
3. Inner washer (0.656” ID)
4. Shock absorber
5. Outer washer (0.563” ID)
6. Lock nut
7. Control arm tower
8. Washer (0.445” ID)
9. Flange nut
10. Cap screw
11. Frame stud
1
1
2
3
4
5
6
7
8
9
8
10
11
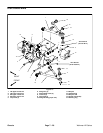
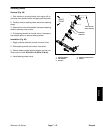
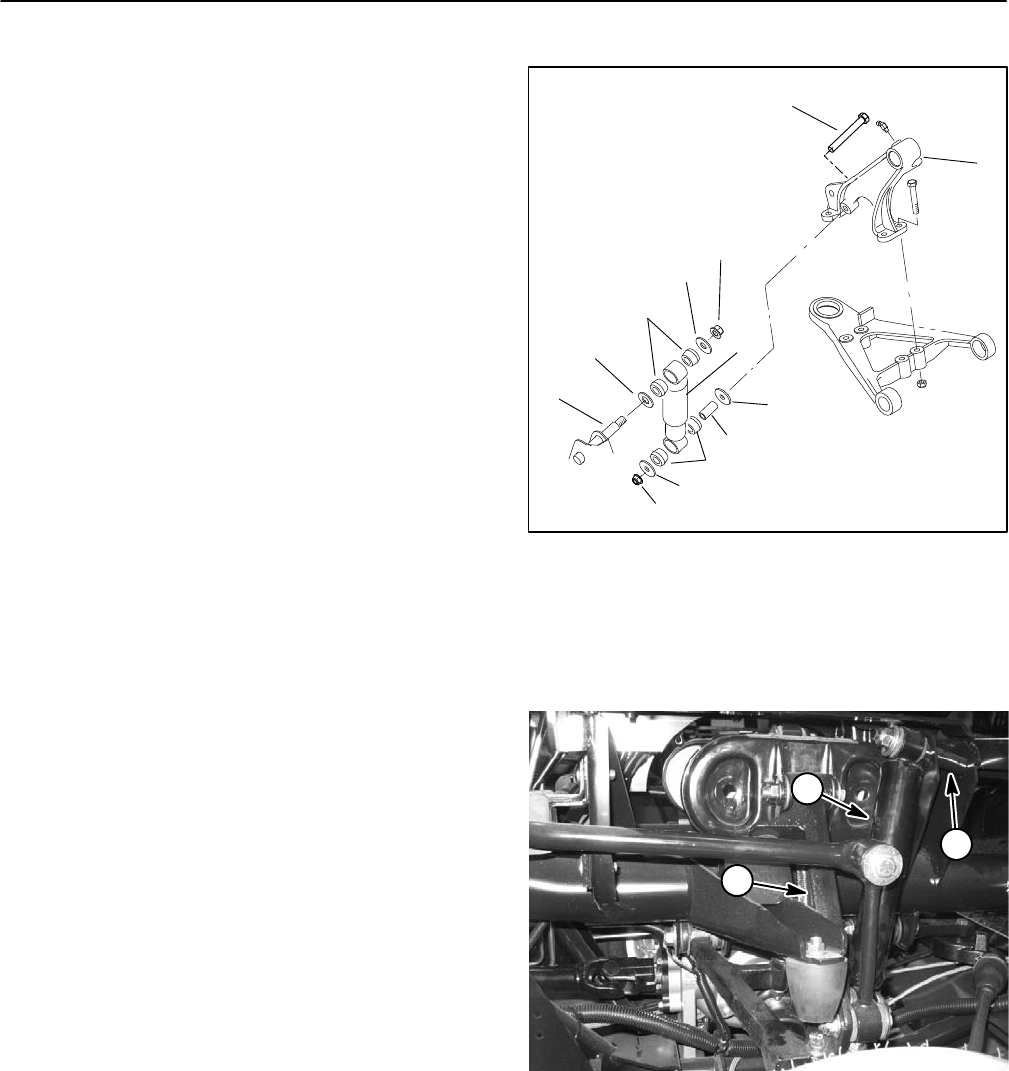
1. Shock absorber
2. Frame stud
3. Control arm tower
Figure 24
2
1
3