


Workman HD SeriesPage 8 − 34Electrical System
Battery Service
The battery is the heart of the electrical system. With reg-
ular and proper service, battery life can be extended. Ad-
ditionally, battery and electrical component failure can
be prevented.
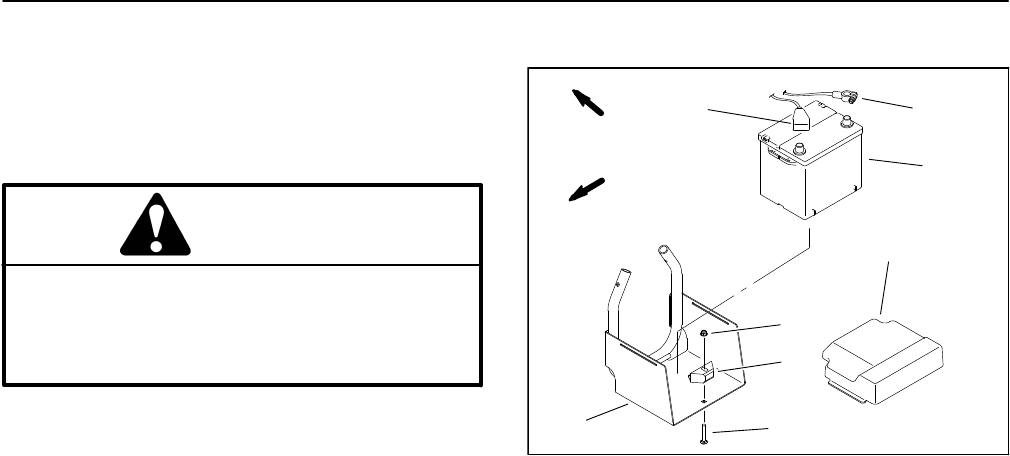
CAUTION
When working with batteries, use extreme cau-
tion to avoid splashing or spilling electrolyte.
Electrolyte can destroy clothing and burn skin
and eyes. Always wear safety goggles and a face
shield when working with batteries.
Battery Specifications
BCI Group 26 Battery
540 Amp Cranking Performance at 0F (−18C)
80 minute Reserve Capacity at 80F (27C)
Electrolyte Specific Gravity (fully charged): from 1.250
to 1.280
Electrolyte Specific Gravity (discharged): 1.240
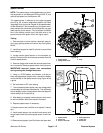
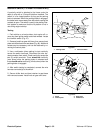
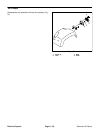
Battery Removal and Installation (Fig. 49)
1. Make sure that ignition switch is in the OFF position.
2. Squeeze the battery cover to release cover tabs from
battery tray. Remove battery cover from the frame. Loos-
en battery retainer that secures battery to battery tray.
3. Loosen and remove negative (−) cable from battery.
After negative cable has been removed, loosen and re-
move positive (+) cable.
4. Carefully remove battery from machine.
5. Install battery in reverse order making sure to con-
nect and tighten positive (+) cable to battery before con-
necting negative (−) cable.
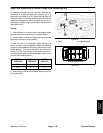
NOTE: Before connecting the negative (−) cable to the
battery, connect a digital multimeter (set to DC Amps)
between the negative battery post and the negative (−)
cable connector. The reading should be less than 0.1
amp. If the reading is 0.1 amp or more, the machine’s
electrical system should be tested for short circuits or
faulty components and repaired.
6. Coat battery posts and cable connectors with Battery
Terminal Protector (Toro Part No. 107−0392) or petro-
leum jelly to prevent corrosion.
7. Make sure that battery retainer secures battery in
place. Install battery cover to battery tray.
Figure 49
1. Battery
2. Negative cable
3. Positive cable
4. Cover
5. Flange nut
6. Battery retainer
7. Carriage screw
8. Battery tray
FRONT
RIGHT
1
2
3
4
5
6
7
8
Battery Inspection and Maintenance
1. Check battery case for cracks. Replace battery if
cracked or leaking.
2. Check battery terminal posts for corrosion. Use wire
brush to clean corrosion from posts.
IMPORTANT: Before cleaning the battery, tape or
block vent holes to the filler caps and make sure the
caps are on tightly.
3. Check for signs of wetness or leakage on the top of
the battery which might indicate a loose filler cap, over-
charging, a loose terminal post or overfilling. Also, check
battery case for dirt and oil. Clean the battery with a solu-
tion of baking soda and water, then rinse it with clean wa-
ter.
4. Check that the cover seal is not broken. Replace the
battery if the seal is broken or leaking.