


Workman HD Series Page 6 − 17 Drive Train
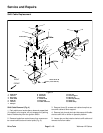
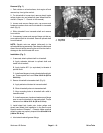
Transaxle Removal (Fig. 12)
1. Park vehicle on a level surface. Stop the engine and
remove key from ignition switch. Remove the bed or oth-
er attachment(s). Allow transaxle and engine to cool.
2. Disconnect negative (−) battery cable from battery
first. Then disconnect positive (+) battery cable from bat-
tery (see Battery Service in Chapter 8 − Electrical Sys-
tem in this manual).
3. Remove drain plug from bottom of transaxle and al-
low oil to drain into a suitable drain pan. Install drain plug
after draining is complete.
4. Note orientation of 90
o
fitting connected to strainer
on side of transaxle. Remove hydraulic hose and 90
o
fit-
ting from strainer.
5. Remove muffler (see Muffler Removal in the ap-
propriate Engine Chapter in this manual).
6. Remove hydraulic filter assembly and bracket.
7. Disconnect and label electrical leads that attach to
transaxle and PTO (if equipped).
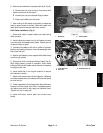
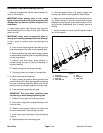
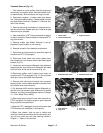
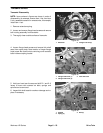
8. Disconnect clutch cable from clutch release lever,
then loosen jam nut to remove clutch cable from support
bracket (Fig. 13).
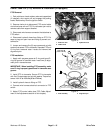
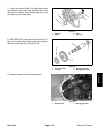
9. Loosen jam nut to remove differential lock cable from
support bracket, then disconnect differential lock cable
from lock lever at left rear of transaxle (Fig. 14).
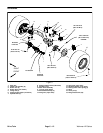
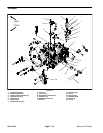
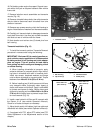
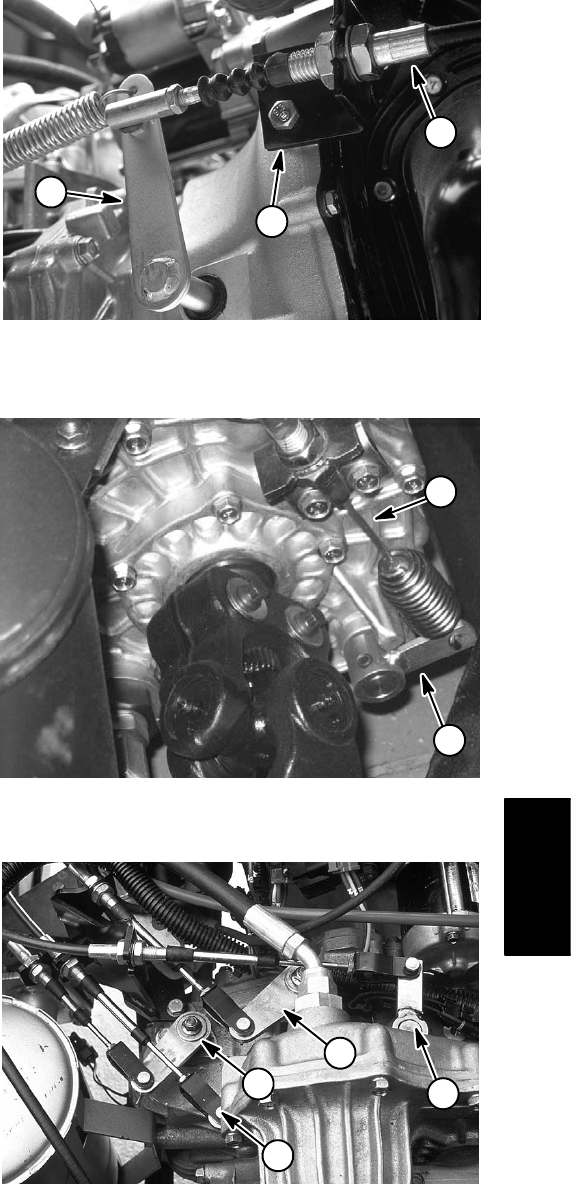
10.Disconnect shifter control cables from levers on
transaxle and PTO (if equipped) (Fig. 15). Do not loosen
cable jam nuts at shift cable mount bracket.
11. Remove shift cable mount bracket from transaxle,
keeping shifter control cables attached to bracket. Posi-
tion bracket away from transaxle.
12.On Workman 4WD vehicles, remove differential dri-
veshaft from the transaxle (see Differential Driveshaft
Removal in the Service and Repairs section of Chapter
10 − Front Wheel Drive (4WD)).
13.Disconnect return hydraulic hose from transaxle (or
PTO if equipped). Put caps or plugs on open hose and
fitting to prevent contamination.
14.Remove PTO, if equipped, from top of transaxle (see
PTO Removal and Installation in this section).
15.Block front wheels. Jack−up rear of vehicle and
install jack stands so transaxle can be removed by slid-
ing out from under rear axle (see Jacking Vehicle in
Chapter 1 − Safety in this manual).
1. Clutch cable
2. Clutch release lever
3. Support bracket
Figure 13
1
2
3
1. Differential lock cable
2. Differential lock lever
Figure 14
1
2
1. First−Reverse
2. High−Low
3. 2nd−3rd
4. PTO clutch
Figure 15
1
2
3
4
Drive Train