


Workman HD Series Page 6 − 11 Drive Train
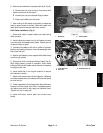
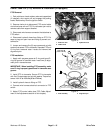
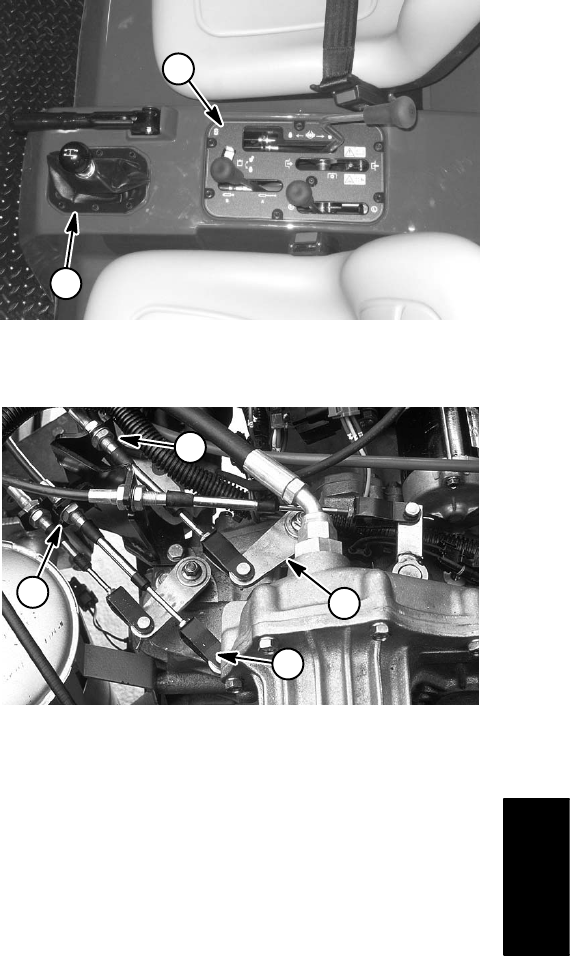
6. Remove shift cable from transaxle shift lever (Fig. 6):
A. Remove hair pin and clevis pin that secure shift
cable to shift lever on transaxle.
B. Loosen jam nuts on bulkhead fitting of cable.
C. Disconnect cable from shift lever.
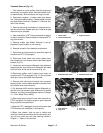
7. Note routing of shift cable and location of cable ties
used to secure cable to vehicle. Slide shift cable from
lower shift boot and remove cable from vehicle.
Shift Cable Installation (Fig. 4)
1. Route shift cable in same location as noted during
cable removal.
2. Install cable clevis onto front of shift cable so clevis
is at mid−point of threaded end of cable. Tighten jam nut
to secure clevis to cable.
3. Connect shift cable to shift link on shifter in operator
platform by inserting clevis pin from the passenger side,
then install hair pin.
4. Secure shift cables to lever support with cable clamp
and three (3) screws.
5. Spread jam nuts on bulkhead fitting of cable (Fig. 6).
With cable properly routed to transaxle, install cable
bulkhead fitting to shift cable mount bracket on transaxle
and tighten jam nuts.
6. Install cable ties in the original locations to secure
shift cables to vehicle.
7. Adjust shift cables (see vehicle Operator’s Manual)
and secure cable clevis to transaxle shift lever with clevis
pin and hair pin.
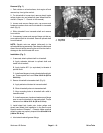
8. Check adjustment of shift stop bolts. Move shift lever
forward until lever stops. Hold lever in stopped position
and adjust stop bolt so that head just contacts lever.
Tighten hex nut on stop bolt.
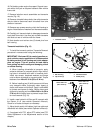
9. Install shift boot, control plate and control lever
knobs.
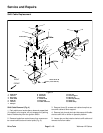
Figure 5
1. Shift boot 2. Control plate
1
2
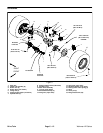
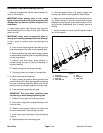
1. First−Reverse
2. 2nd−3rd
3. Bulkhead jam nut
Figure 6
1
2
3
3
Drive Train