3-10
Cisco CRS Carrier Routing System 8-Slot Line Card Chassis Installation Guide
OL-6256-17
Chapter 3 Installing and Removing Air Circulation Components
How to Install or Remove Air Circulation Components
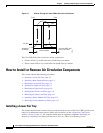
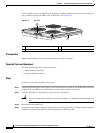
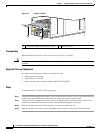
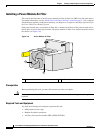
Figure 3-5 Chassis Air Filter
Prerequisites
Before performing this task, you must first remove any front cover plates.
Caution Never operate the Cisco CRS 8-slot line card chassis without an air filter. Doing so can damage the
hardware.
Required Tools and Equipment
You need the following tools and part to perform this task:
• ESD-preventive wrist strap
• Large Phillips screwdriver
• Chassis air filter (Cisco product number CRS-8-LCC-FILTER=)
Steps
To install the chassis air filter, follow these steps:
Step 1 Attach the ESD-preventive wrist strap to your wrist and connect its leash to one of the ESD connection
sockets on the front (PLIM) side of the chassis or a bare metal surface on the chassis.
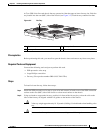
Step 2 Using two hands to support the air filter, orient it so that the ridge on the front of the air filter faces
outward from the front of the chassis and the wire-grid backing support is facing up.
Step 3 Slide the air filter into the air filter slot until it is seated fully within the slot.
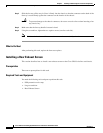
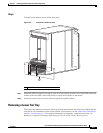
Step 4 Hold the air filter cover plate in place and tighten the two captive screws on the front of the plate.
1 Air filter cover plate (with captive screws) 2 Chassis air filter
122787
PO
WER
O
K
FL
T
AC
FA
IL
C
B
T
M
P
LL
M
O
T
PO
W
ER
O
K
FL
T
AC
FA
I
L
C
B
TM
P
L
LM
O
T
1
2


