


3-13
Cisco CRS Carrier Routing System 8-Slot Line Card Chassis Installation Guide
OL-6256-17
Chapter 3 Installing and Removing Air Circulation Components
How to Install or Remove Air Circulation Components
Steps
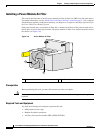
To install a power module air filter, follow these steps:
Step 1 Attach the ESD-preventive wrist strap to your wrist and connect its leash to one of the ESD connection
sockets on the front (PLIM) side of the chassis or a bare metal surface on the chassis.
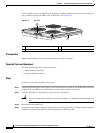
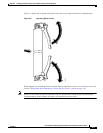
Step 2 Place the screwdriver under the edge of the air filter clip-on holder.
Step 3 Gently pry the holder loose with the screwdriver; it should pop off easily.
Step 4 Place the air filter in position on the front of the power module.
Step 5 Place the holder in position on the front of the power module over the air filter.
Step 6 Press the holder firmly but gently until it snaps into place.
What to Do Next
After performing this task, replace the front cover plates.
Removing a Power Module Air Filter
This section describes how to remove a power module air filter. For further information, see the “About
Line Card Chassis Airflow” section on page 3-1. For complete information on regulatory compliance
and safety, see Regulatory Compliance and Safety Information for the Cisco CRS Carrier Routing
System.
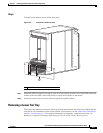
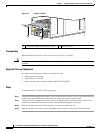
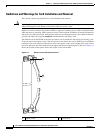
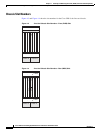
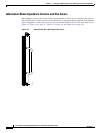
Each power module has a serviceable air filter that is attached to the front of the power module and is
held in place by an air filter clip-on holder. The power module air filter faces outward from the front of
the chassis (see Figure 3-6).
Prerequisites
Before performing this task, you must first remove any front cover plates.
Caution Never operate the Cisco CRS 8-slot line card chassis without an air filter. Doing so can result in damage
to the hardware.
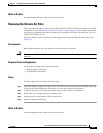
Required Tools and Equipment
You need the following tools to perform this task:
• ESD-preventive wrist strap
• Medium flat-blade screwdriver