


262
Initial value change list
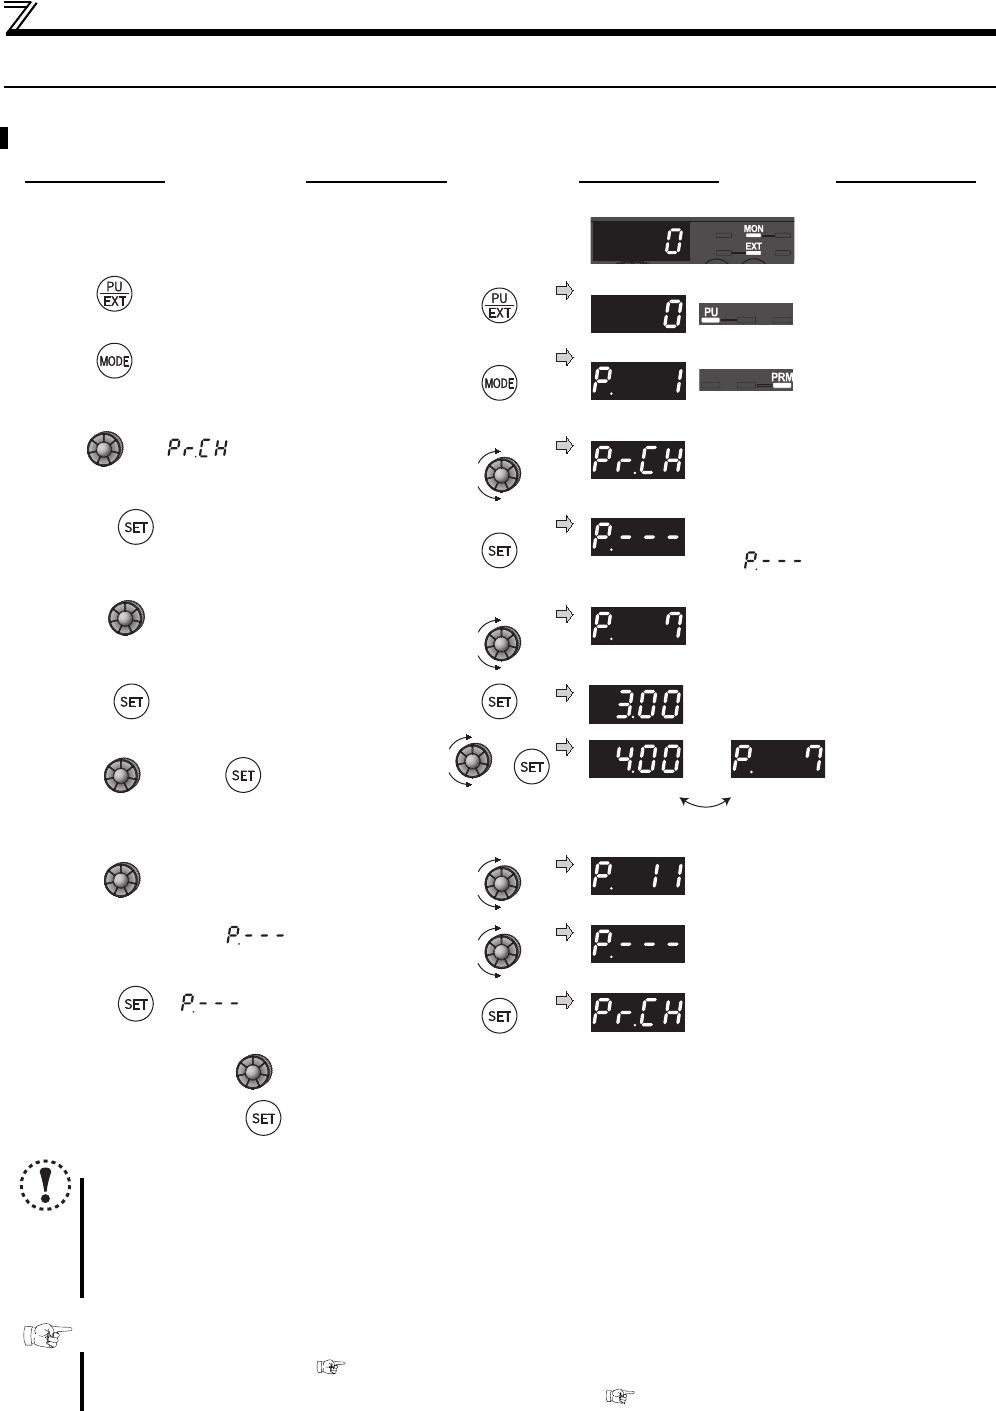
4.23 Initial value change list
Displays and sets the parameters changed from the initial value.
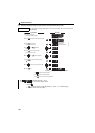
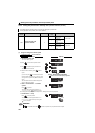
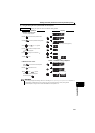
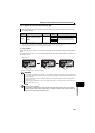
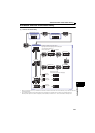
Operation Display
1. Screen at power-ON
The monitor display appears.
2. Press to choose the PU operation mode.
PU indicator is ON.
3. Press to choose the parameter setting mode.
PRM indicator is ON.
(The parameter number read previously appears.)
4. Turn until appears.
5. Pressing changes to the initial value change list
screen.
It may take several seconds for
creating the initial value change list.
" " flickers while creating the
list.
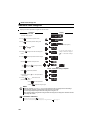
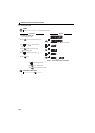
6. Turning displays the parameter number changed.
Press to read the currently set value.
Turn and press to change the setting.
(Refer to step 6 and 7 on page 51)
Flicker... Parameter setting complete!!
Turn to read another parameter.
The display returns to after all parameters
are displayed.
7. Pressing in status returns to the
parameter setting mode.
Turning sets other parameters.
Pressing displays the change list again.
NOTE
Calibration parameters (C0 (Pr.900) to C7 (Pr.905) are not displayed even they are changed from the initial settings.
Only simple mode parameter is displayed when simple mode is set (Pr.160 = 9999)
Pr.160 is displayed independently of whether the setting value is changed or not.
When parameter setting is changed after creating the initial value change list, the setting will be reflected to the initial
value change list next time.
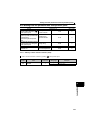
Parameters referred to
C0(Pr.900) FM terminal calibration Refer to page 162
C2(Pr.902) to C7(Pr.905) (Bias and gain of built-in frequency setting potentiometer) Refer to page 173