


LAN Configuration
101
ProSecure Unified Threat Management (UTM) Appliance
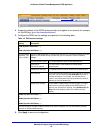
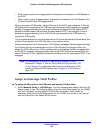
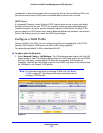
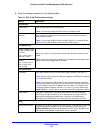
Figure 54.
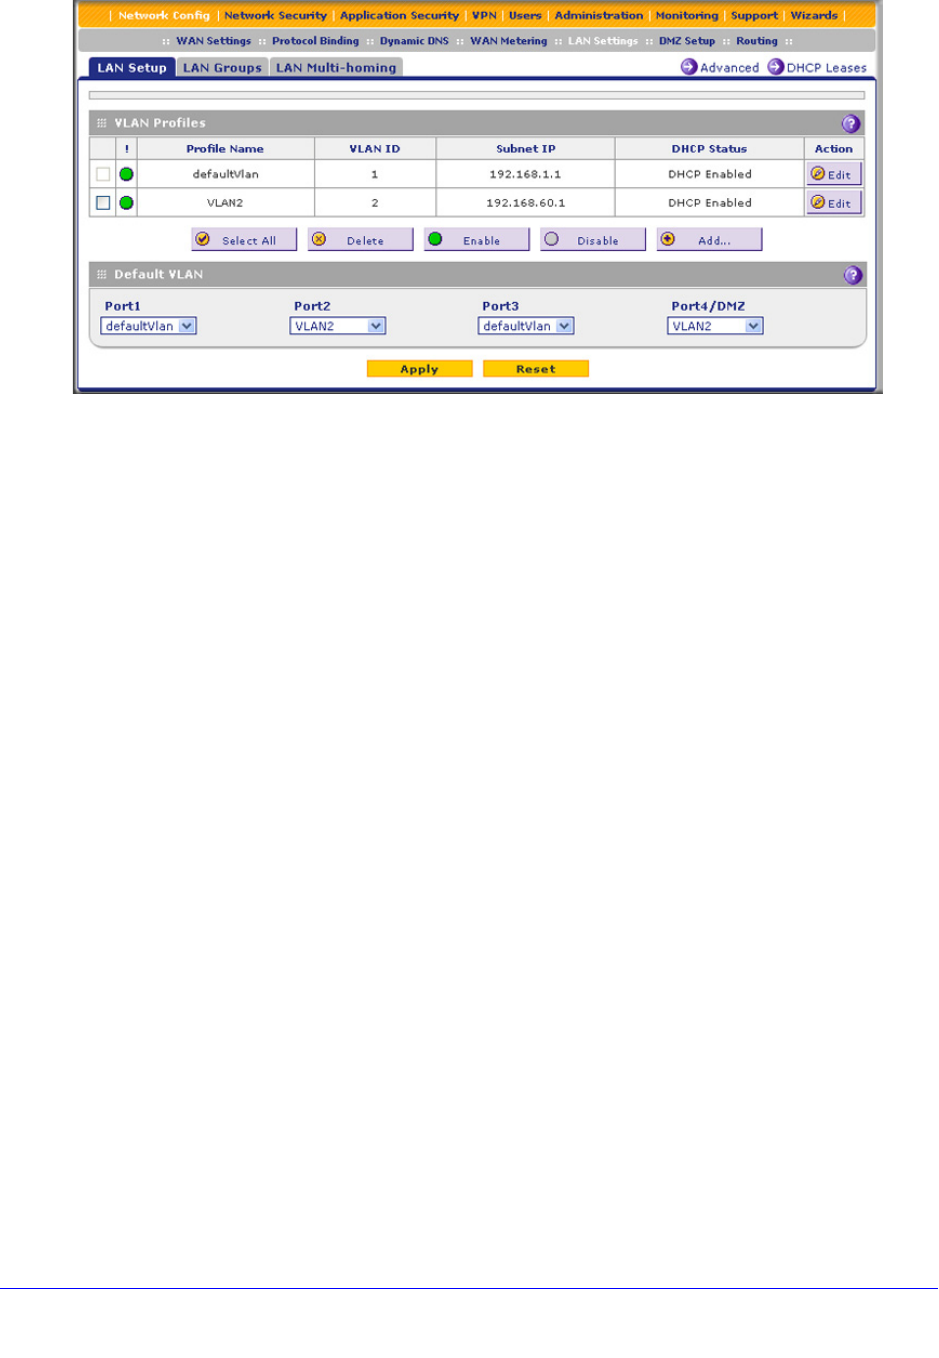
For each VLAN profile, the following fields display in the VLAN Profiles table:
• Check box. Allows you to select the VLAN profile in the table.
• Status icon. Indicates the status of the VLAN profile:
- Green circle. The VLAN profile is enabled.
- Gray circle. The VLAN profile is disabled.
• Profile Name. The unique name assigned to the VLAN profile.
• VLAN ID. The unique ID (or tag) assigned to the VLAN profile.
• Subnet IP. The subnet IP address for the VLAN profile.
• DHCP Status. The DHCP server status for the VLAN profile, which can be either
DHCP Enabled or DHCP Disabled.
• Action. The Edit table button, which provides access to the Edit VLAN Profile screen.
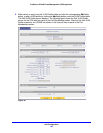
2. Assign a VLAN profile to a LAN port (For the UTM5, UTM10, UTM25, and UTM150: Port 1,
Port 2, Port 3, or Port 4/DMZ; for the UTM50: Port 1, Port 2, Port 3, Port 4, Port 5, or Port
6/DMZ) by selecting a VLAN profile from the drop-down list. Both enabled and disabled
VLAN profiles are displayed in the drop-down lists.
3. Click Apply to save your settings.
VLAN DHCP Options
For each VLAN, you need to specify the Dynamic Host Configuration Protocol (DHCP)
options (see Configure a VLAN Profile on page 103). The configuration of the DHCP options
for the UTM’s default VLAN, or VLAN 1, is explained in Chapter 3, Manually Configure
Internet and WAN Settings. This section provides further information about the DHCP
options.