


Content Filtering and Optimizing Scans
262
ProSecure Unified Threat Management (UTM) Appliance
5. Click Apply to save your settings. The new category is added to the Custom Categories
table. To return to the Custom Categories screen without adding the category, click Cancel.
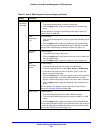
To change an existing custom category:
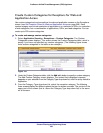
1. In the Action column to the right of the custom category, click the Edit table button. The
Edit Custom Category screen displays. This screen is identical to the Add Custom
Category screen (see Figure 145 on page 259, Figure 146 on page 259, and Figure 147
on page 260).
2. Modify the settings that you wish to change (see the previous table).
3. Click Apply to save your changes. The modified custom group is displayed in the Custom
Categories table.
To delete one or more custom categories:
1. Select the check box to the left of each custom category that you want to delete, or click
the Select All table button to select all custom categories.
2. Click the Delete table button.
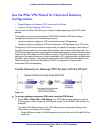
Set Scanning Exclusions for IP Addresses and Ports
After you have specified which IP addresses and ports the UTM scans for malware threats,
you can set scanning exclusion rules for certain IP addresses and ports.
To save resources, you can configure scanning exclusions for IP addresses and ports that
you know are secure. For example, if your network includes a web server that hosts web
pages that are accessible by anyone on the Internet, the files that are hosted by your web
server do not need to be scanned. To prevent the UTM from scanning these files, you can
configure a scanning exclusion for your web server.
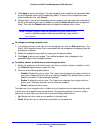
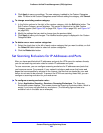
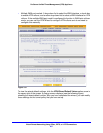
To configure scanning exclusion rules:
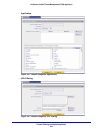
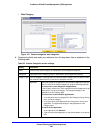
1. Select Application Security > Services> Scanning Exclusions. The Scanning
Exclusions screen displays. This screen shows the Scanning Exclusions table, which is
empty if you have not specified any exclusions. (The following figure shows one
exclusion rule in the table as an example.)