


Manage Users, Authentication, and VPN Certificates
406
ProSecure Unified Threat Management (UTM) Appliance
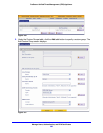
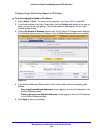
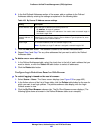
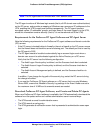
6. In the Add Defined Addresses section of the screen, add an address to the Defined
Addresses table by entering the settings as explained in the following table:
7. Click the Add table button. The address is added to the Defined Addresses table.
8. Repeat Step 6 and Step 7 for any other addresses that you want to add to the Defined
Addresses table.
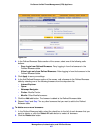
To delete one or more addresses:
1. In the Defined Addresses table, select the check box to the left of each address that you
want to delete, or click the Select All table button to select all addresses.
2. Click the Delete table button.
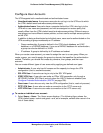
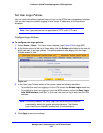
Configure Login Restrictions Based on Web Browser
To restrict logging in based on the user’s browser:
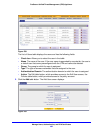
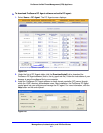
1. Select Users > Users. The Users screen displays (see Figure 238 on page 402).
2. In the Action column of the List of Users table, click the Policies table button for the user for
which you want to set login policies. The policies submenu tabs display, with the Login
Policies screen in view.
3. Click the By Client Browser submenu tab. The By Client Browser screen displays. (The
following figure shows a browser in the Defined Browsers table as an example.)
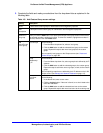
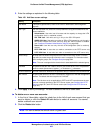
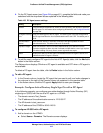
Table 103. By Source IP Address screen settings
Setting Description
Source Address Type Select the type of address from the drop-down list:
• IP Address. A single IP address.
• IP Network. A subnet of IP addresses. You need to enter a netmask length in
the Mask Length field.
Network Address / IP
Address
Depending on your selection from the Source Address Type drop-down list, enter
the IP address or the network address.
Mask Length For a network address, enter the netmask length (0–32).
Note: By default, a single IP address is assigned a netmask length of 32.