


Content Filtering and Optimizing Scans
205
ProSecure Unified Threat Management (UTM) Appliance
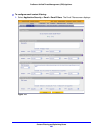
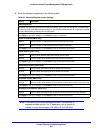
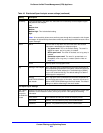
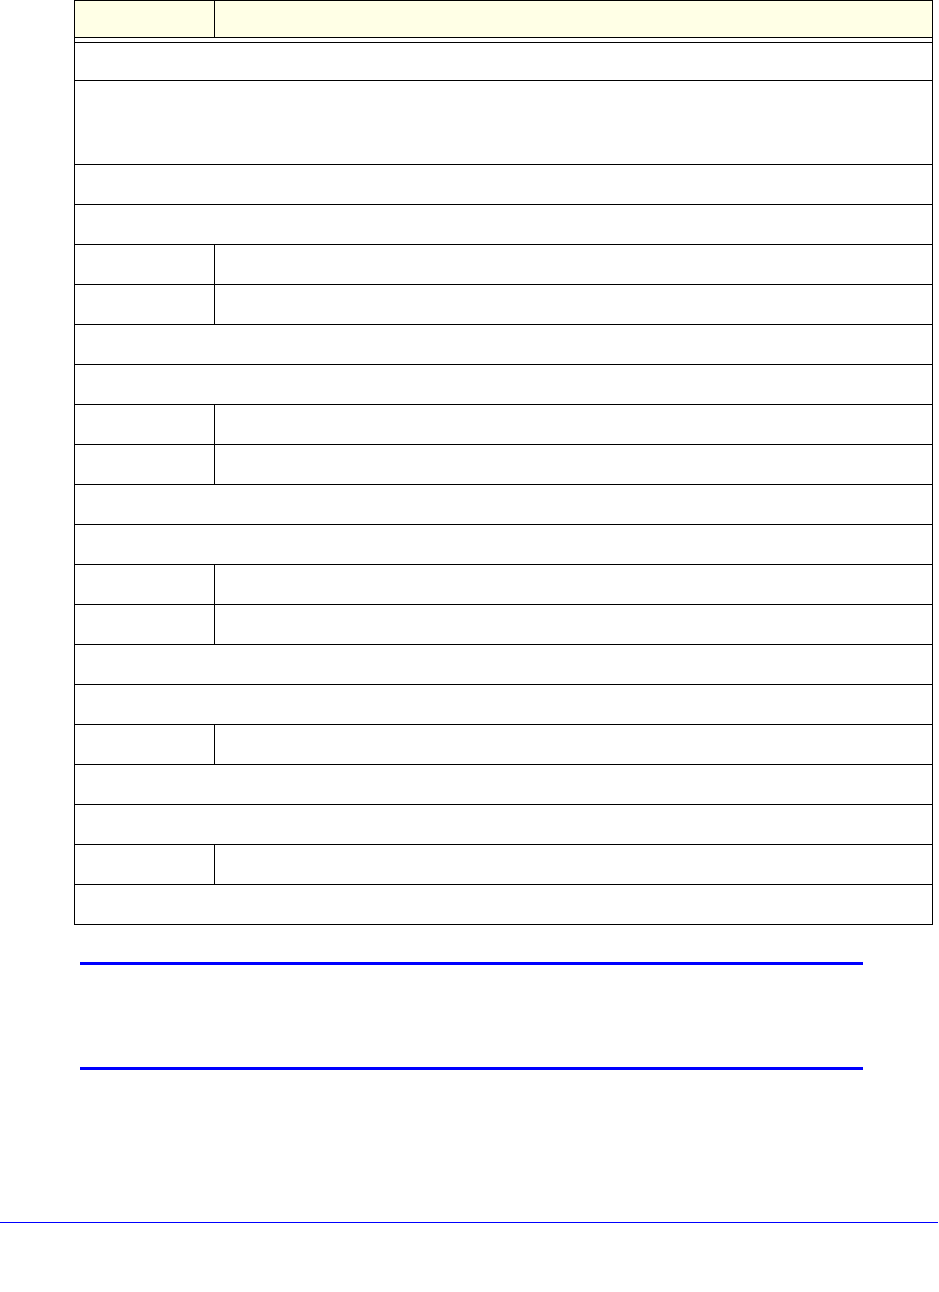
2. Enter the settings as explained in the following table:
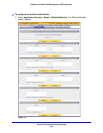
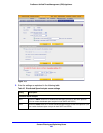
Note: In the fields of the Whitelist/Blacklist screen, use commas to
separate multiple entries. For IP addresses, use a hyphen to
indicate a range (for example, 192.168.32.2-192.168.32.8).
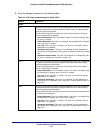
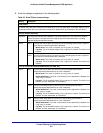
Table 44. Whitelist/Blacklist screen settings
Setting Description
Whitelist/Blacklist
By default, the whitelist and blacklist are blank and enabled, that is, the Yes radio button is selected. After
you have entered email addresses and domains on the whitelist and blacklist but do not yet want to enable
the lists, disable them by selecting the No radio button.
Click Apply to save your settings, or click Reset to reset your selection.
Sender IP Address (SMTP Only)
Whitelist Enter the source IP addresses from which emails can be trusted.
Blacklist Enter the source IP addresses from which emails are blocked.
Click Apply to save your settings, or click Reset to clear all entries from these fields.
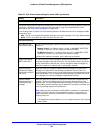
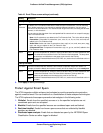
Sender Domain (SMTP Only)
Whitelist Enter the email domains from which emails can be trusted.
Blacklist Enter the sender email domains from which emails are blocked.
Click Apply to save your settings, or click Reset to clear all entries from these fields.
Sender Email Address (SMTP Only)
Whitelist Enter the email addresses from which emails can be trusted.
Blacklist Enter the email addresses from which emails are blocked.
Click Apply to save your settings, or click Reset to clear all entries from these fields.
Recipients Domain (SMTP Only)
Whitelist Enter the sender email domains of the recipients to which emails can be safely delivered.
Click Apply to save your settings, or click Reset to clear all entries from this field.
Recipients Email Address (SMTP Only)
Whitelist Enter the email addresses of the recipients to which emails can be safely delivered.
Click Apply to save your settings, or click Reset to clear all entries from this field.