102
BASIC EDITING TECHNIQUES CHP. 4
3.
Click the Paste button ( ).
Clipboard events are pasted at the cursor position on the track. Existing track events can be overlapped
with newly pasted information.
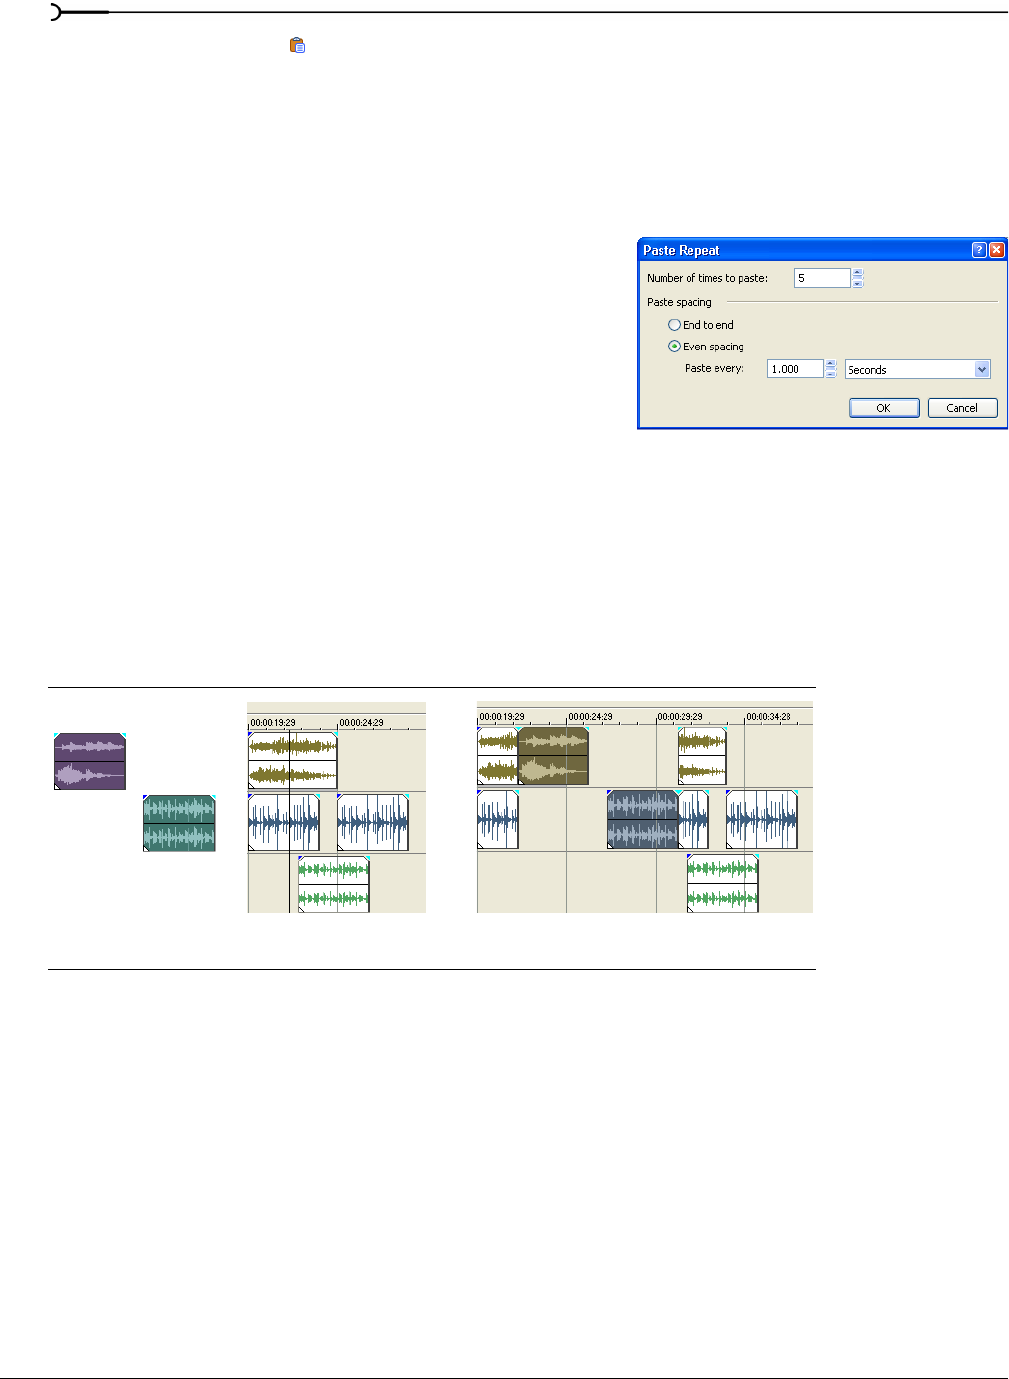
Using paste repeat
Use paste repeat to specify how many times clipboard events are pasted at the cursor position on the selected
track and to specify the space between pasted events.
1.
Copy a selection to the clipboard.
2.
From the Edit menu, choose Paste Repeat. The Paste Repeat
dialog appears.
3.
Specify the number of times to paste the clipboard contents
and the space between successive copies.
4.
Click OK.
Using paste insert
When using paste insert, clipboard events are placed at the cursor position on the selected track and existing
events on all tracks are moved further down the timeline by the total length of pasted information. This
action differs from post-edit ripple mode because pasting in post-edit ripple mode affects only the tracks in
which material is pasted, while paste insert affects all tracks in the project.
1.
Copy a selection to the clipboard.
2.
From the Edit menu, choose Paste Insert
Punching-in and crossfading events
You can insert events into the middle of (on top of) existing events without altering the timing of the
project. When the inserted event ends, the original event continues playing as if it had never stopped.
You can choose the duration of crossfades for punched-in audio events.
1.
From the Options menu, choose Preferences. The Preferences dialog appears.
2.
Click the Editing tab.
3.
Select Quick fade length of audio events. Specify a duration for each transition.
Clipboard contents Events before paste insert Events after paste insert
Events on all tracks (not just tracks with
pasted material) are pushed down the timeline.


