


CHP. 5 ADVANCED EDITING TECHNIQUES
139
Events
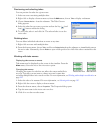
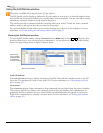
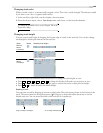
The Events category displays information about all of the events in your project. You may sort any of the
information by clicking a column’s header. The number of columns in the
Events category requires that you
use the scroll bar to view them all.
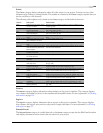
The following table explains each column in the Events category and describes its function.
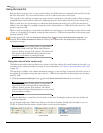
Markers
The Markers category displays information about markers on the project’s timeline. This category displays
two columns: the marker’s position on the timeline and the marker’s name. For more information, see Working
with markers on page 116.
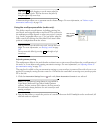
Regions
The Regions category displays information about regions on the project’s timeline. This category displays
four columns: the region’s start position, end position, length, and name. For more information, see Working
with regions on page 117.
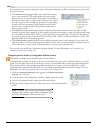
Selected Events
The Selected Events category is visually identical to the Events category except that the Edit Details window
only displays information about events that are selected in your project.
Column Description Edit function
Track Displays the track number where
the event is located.
Move the event to a different location by entering a different track
number (pg. 60).
Start Displays when on the timeline the
event starts playback.
Enter a different value to cause the event to begin playback sooner or
later in the project (pg. 60).
End Displays when on the timeline the
event ends playback.
Enter a different value to cause the event to end playback sooner or
later in the project (pg. 60).
Length Displays the total length of the
event.
Enter a different value to increase or decrease the event’s playback
time.
Number of Takes Displays the amount of recorded
takes contained in the event.
Cannot be edited (display only).
Active Take Name Displays the event’s current take
name.
Enter a different name for the current take (pg. 131).
Take Start Displays the offset into the source
media file when the placed event
begins playback.
Enter a different value to cause the take to playback sooner or later
from the source media file.
Timecode In Displays the media file timecode at
the start of the event.
Display only (cannot be edited).
Timecode Out Displays the media file timecode at
the end of the event.
Display only (cannot be edited).
File Path Displays the path of the event’s
media file.
Enter a new media file reference path for the event to use.
Tape Name Displays the name of the source
media tape name.
Change the tape name here or in the properties dialog for the media
file (pg. 239).
Select Displays whether the event is
selected in the project.
Toggle the event’s selection by clicking the check box. A check mark in
the box indicates that the event is selected (pg. 96).
Mute Displays whether the event is
muted.
Toggle the event’s mute switch by clicking the check box. A check
mark in the box indicates that the event is muted (pg. 171).
Loop Displays whether the event is
looped for playback.
Toggle the event’s loop switch by clicking the check box. A check mark
in the box indicates that the event is looped for playback (pg. 171).
Lock Displays whether the event is
locked.
Toggle the event’s lock switch by clicking the check box. A check mark
in the box indicates that the event is locked (pg. 171).
Normalize Displays whether the event is
normalized.
Toggle the event’s normalize switch by clicking the check box. A check
mark in the box indicates that the event is normalized (pg. 172).
Snap Offset Displays when in the event the snap
offset is positioned.
Enter a different value to change the snap offset position in the event
(pg. 126).