


238
USING ADVANCED VIDEO FEATURES CHP. 13
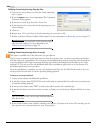
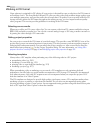
Modifying video properties
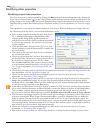
Modifying project video properties
You can access project video properties by clicking the File menu and choosing Properties or by clicking the
Project Video Properties button ( ) on the Video Preview window. Many of these settings are identical to the
settings found on the
Project tab of the Custom Template dialog. Final render properties set up in the Custom
Template dialog override the following Project Properties settings. For more information, see Video tab on page
312.
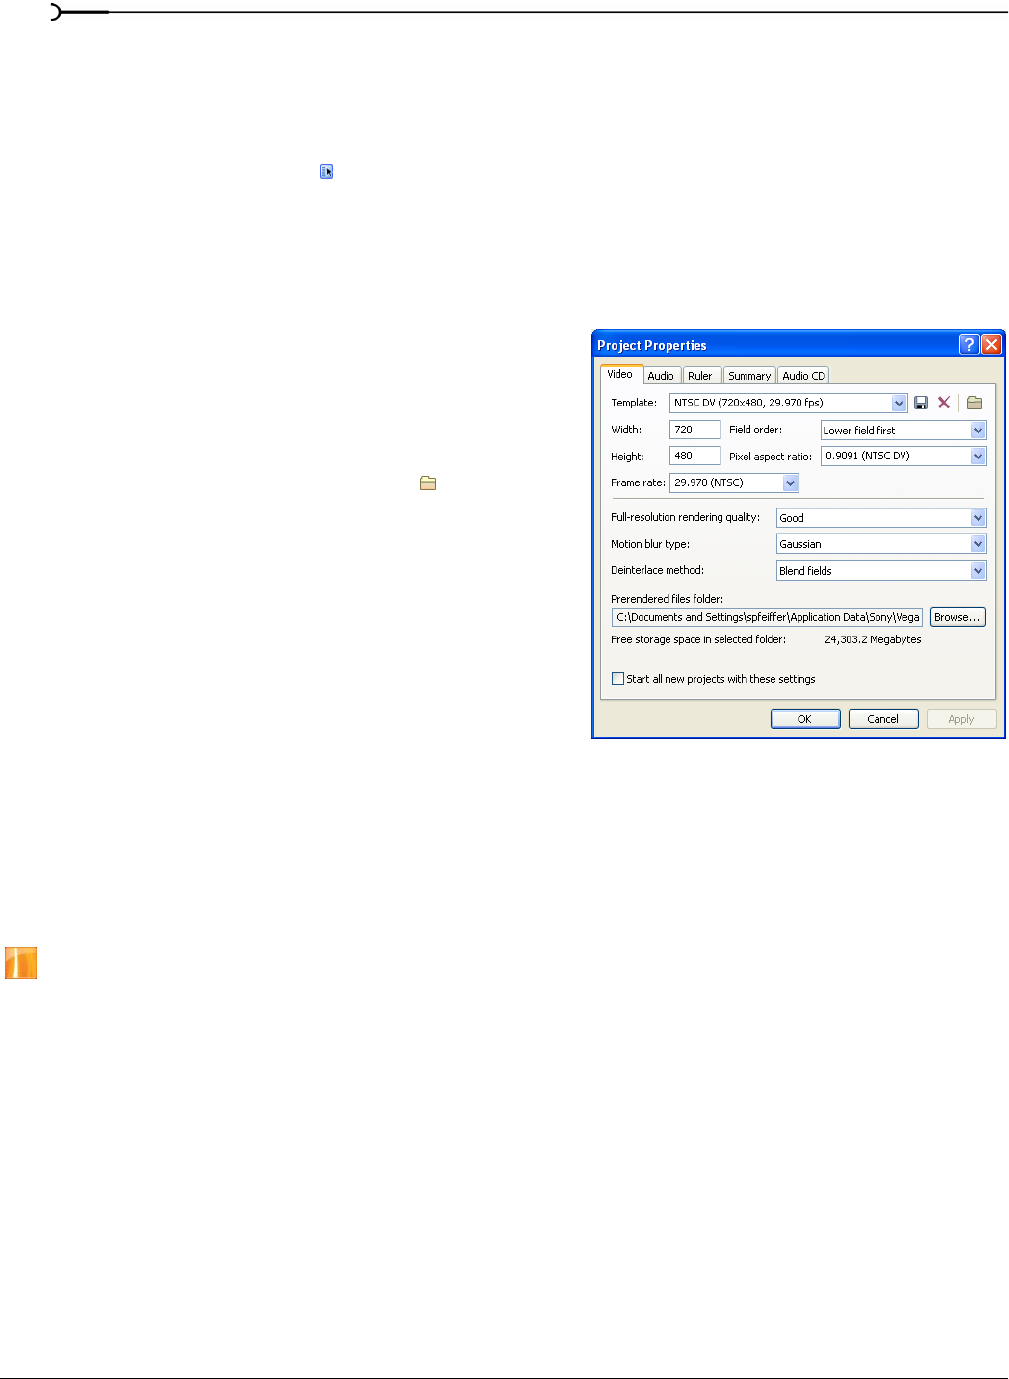
These properties control all of the default settings for your project. Without making any changes, these are
also the settings that are used to create a final rendered movie file.
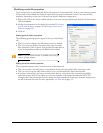
• Select a preset template from the Templa te drop-down
list to automatically configure the remaining video
controls in this dialog. Many popular formats are
included, but you should consult your hardware manuals
if you have any questions. You can also save your own
custom template.
• Click the Match Media Settings button ( ) to set your
project properties to match the properties of a media file
of your choosing.
• The values in the Width and Height boxes set the frame
size of your final movie.
• Choose an option from the Field Order drop-down list to
set the field order. Choose
None (Progressive) for video to
be viewed on a computer monitor. For DV output,
choose
Lower Field First. If the output is jittery or shaky,
or your hardware’s manual specifies it, choose
Upper Field
First
. For more information, see Interlacing and field order
on page 371.
• Choose the pixel aspect ratio for the final movie’s destination from the Pixel aspect ratio drop-down list. For
more information, see Pixel Aspect Ratio on page 383.
• Choose a frame rate for the final movies destination from the Frame rate drop-down list. For more
information, see Frame Rate (Video) on page 381.
• Choose a rendering quality level from the Full resolution rendering quality drop-down list. For most projects,
Good is the recommended setting. If you have critical material where nothing but the highest quality
rendering will do, select
Best. Please note that rendering time may increase dramatically as large amounts
of extra processing is required for the
Best setting.
• Some effects and transitions can involve motion or animation. The Motion blur type drop-down list allows
you to select whether the frames are blurred slightly to create the illusion of motion on individual frames.
This can make computer generated animation appear more smooth and natural.
Gaussian is the best
choice in most situations where blurring is required. Available only in the full version of Vegas software.
•The Deinterlace method drop-down list provides several options relating to interlacing. Source video from a
television is interlaced. When Vegas software renders effects, it needs to deinterlace the two fields that
make up a frame. You can choose the exact method used in this list. If you choose the
None option, the
fields are left interlaced. If you choose the
Blend option, contents are used from both fields, which is a good
choice for high-detail, low-motion material. If you choose the
Interpolate option, a single field is used at a
time, which is good for low-detail, high-motion material.
• Choose the location for saving prerendered preview files in the Prerendered files folder box. For more
information, see Prerendering video on page 289.
• Select the Start all new projects with these settings check box to always use these settings for new projects.