


CHP. 13 USING ADVANCED VIDEO FEATURES
227
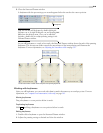
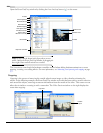
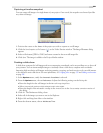
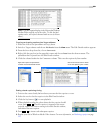
Capturing a timeline snapshot
You can create still images of a single frame of your project. Once saved, the snapshot can be used just like
any other still image.
1.
Position the cursor on the frame of the project you wish to capture as a still image.
2.
Click the Save Snapshot to File button ( ) on the Video Preview window. The Image Filename dialog
appears.
3.
Select a file format (JPEG or PNG) and enter a name for the new still image file.
4.
Click Save. The image is added to the Project Media window.
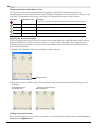
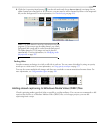
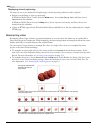
Creating a slide show
A slide show composed of still images and an accompanying soundtrack can be an excellent way to show off
your pictures. You can insert multiple images to instantly create a slide show, complete with crossfades.
Importing high-resolution still images and using panning, cropping, and track motion tools can add interest
to an otherwise static slide show. For more information, see Cropping video on page 223 and Adding track motion
on page 281.
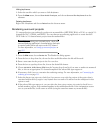
1.
In the Options menu, verify that Automatic Crossfades is selected.
2.
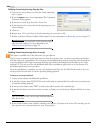
From the Options menu, choose Preferences. Adjust the following settings on the Editing tab:
• Enter the length for the still images in the New still image length box.
• Select Automatically overlap multiple selected media when added.
• Enter the length of the automatic overlap in the Amount box in the Cut-to-overlap conversion section of
the dialog.
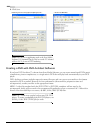
3.
Click OK. The Preferences dialog closes.
4.
Select all of the images you want to use in the Explorer.
5.
Right-click and drag these files to the timeline.
6.
From the shortcut menu, choose Add Across Time.