


156
USING AUTOMATION CHP. 7
Mute automation (audio and video)
This feature is available only in the full version of Vegas software.
Mute automation changes a track’s mute state throughout your project. Mute automation is either on or off
with no fade between. If you want to use fades, apply volume automation.
When you apply mute automation to a track, it’s possible to have a track that is muted and soloed
simultaneously. The mute state overrides the solo state:
• If a track’s Solo button is selected, the track is included in the solo group, but it will be muted whenever
the mute automation is set to mute the track.
• If the track’s Mute button is selected, the track is muted regardless of the mute automation settings.
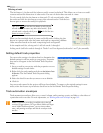
Adding or removing mute automation
1.
Select a track.
2.
From the Insert menu, choose Audio Envelopes or Video Envelopes, or right-click in the track list and
choose
Insert/Remove Envelope from the shortcut menu.
3.
From the submenu, choose Mute. A check mark is displayed next to the command, and an envelope is
added to the timeline.
4.
You can adjust the automation by editing the envelope in the timeline or by using the Mute button in
the track header when
Show Automation Controls is selected.
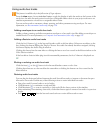
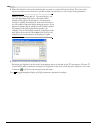
Adjusting mute automation settings
1.
Click the Automation Settings button and select Show Automation Controls. The Mute button is
displayed as
.
2.
Click the Mute button to change the track's mute automation state.
The button behaves differently depending on the track automation recording mode:
• When the track automation mode is set to Off, the button mutes the entire track.
• When the track has a mute envelope and the track automation mode is set to Read, the button changes
state to reflect the envelope setting during playback but cannot be adjusted.
• When the track has a mute envelope and the track automation mode is set to Touch or Latch, the button
edits the envelope setting at the cursor position.
If you click the Mute button during playback, the behavior varies depending on the selected
automation recording mode. For more information, see Automating 5.1 surround projects on page 167.
Volume or pan automation (audio only)
You can change a track’s volume or position in the stereo field throughout a project using automation
envelopes.
Adding or removing volume or pan automation
1.
Select an audio track.
2.
From the Insert menu, choose Audio Envelopes, or right-click in the track list and choose Insert/Remove
Envelope
from the shortcut menu.