


44
GETTING STARTED CHP. 2
2.
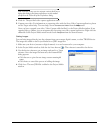
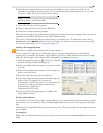
Enter your project settings on the various tabs. For more
information, see Working with project properties on page 333.
•The Video tab allows you to select the video format and
other video parameters.
•The Audio tab allows you to set up the basic audio
settings.
•The Ruler tab allows you to choose the way the ruler is
delineated (beats, seconds, etc.).
•The Summary tab allows you to enter any relevant
information and reminders about your project.
• The Audio CD tab allows you to enter information for
burning audio CDs. This tab is available only in the full
version of Vegas software.
Tip:
The easiest way to set the often-complex properties on
the
Video tab is to select a template that matches your media
(e.g., NTSC DV (720x480, 29.970 fps)).
3.
Click OK.
4.
From the File menu, choose Save. Enter a name, browse for a location, and click Save to save your project
(VEG file).
You can change project settings at any time while working on a project. From the File menu, choose
Properties to change any of these settings.
Setting video properties based on a media file
You can automatically set your project video properties to match an existing video file.
1.
From the File menu, choose Properties.
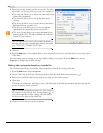
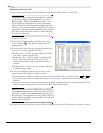
2.
On the Video tab of the Project Properties dialog, click the Match Media Settings button ( ).
3.
Browse for a media file that has the settings you wish you use for the project.
4.
Click Open.
The frame size, frame rate, pixel aspect ratio, and field order of this file are automatically detected and the
project properties are set to match.
Tip:
To save this information for future use, enter a name in
the
Template box and click the Save Template button ( ). If
your projects typically use these settings, select the
Start all
new projects with these settings check box.
5.
Click OK to save the new project properties.