


308
SAVING, RENDERING, AND PRINTING PROJECTS CHP. 17
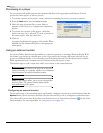
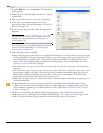
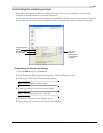
1.
From the File menu, choose Render As. The Render As
dialog appears.
2.
Select the drive and folder where you want to save the
rendered file.
3.
Type a new name in the File name box, if necessary.
4.
In the Save as type drop-down list, choose the
appropriate format. For more information, see Selecting a
file format on page 309.
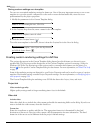
5.
In the Template drop-down list, select the appropriate
template.
Tip:
If your source media is in DV format, select a DV
template. For more information, see Working in DV
format on page 234.
You can customize the rendering settings by clicking
Custom. For more information, see Customizing the
rendering process on page 311.
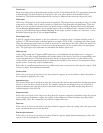
6.
Select any check boxes as needed:
• Select the Save project as path reference in rendered media check box to save the path to your Vegas project
in the rendered file. Saving the project path allows you to easily return to the source project if you use
your rendered file in another project. The check box will be unavailable if you haven’t saved your
project or if you’re rendering using a third-party file-format plug-in. For more information, see Project
references in rendered media files on page 58.
• Select the Render loop region only check box to render only the portion of your project within the loop
selection.
• Select the Stretch video to fill output frame size (do not letterbox) check box to adjust the aspect ratio so the
output frame is filled on all edges. Clear the check box to maintain the current aspect ratio and add
black borders to fill the extra frame area (letterbox). This option is useful when the desired output
format does not match the frame aspect ratio of your project.
• Select the Save project markers in media file check box to save any regions and markers in your project to
the final rendered file.
• Select the Render using networked computers check box (available only in the full version of Vegas
software) if you want to queue multiple renders on a single computer or to harness the power of those
other computers to speed up your rendering times. For more information, see Rendering with networked
computers on page 316.
7.
Click Save. A small dialog box appears, displaying the progress of the render. You can cancel the
rendering process by clicking the
Cancel button in the dialog box. You can also view the progress of the
render or cancel the render using the status bar in the lower-left corner of the window.