


CHP. 4 BASIC EDITING TECHNIQUES
123
Setting up an audio editing program
If you already have Sound Forge software loaded on your computer when you installed Vegas software, the
installation should have detected it and made it your default audio editing program. However, if you do not
have Sound Forge software or want to specify a different audio editor, you may do so in the Preferences
dialog.
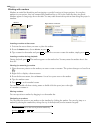
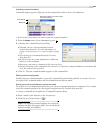
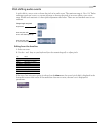
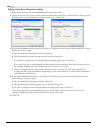
1.
From the Options menu, choose Preferences. The Preferences dialog appears.
2.
In the Preferences dialog, click the Audio tab.
3.
Click the Browse button to the right of the Preferred audio editor box. The Preferred Audio Editor dialog
appears.
4.
From this dialog, navigate to the application to use for editing audio files.
5.
Select the application’s executable icon (.exe) and click Open to set the application as your default audio
editor.
The application’s path displays in the Preferred audio editor box.
Opening an audio editor from Vegas software
All events in your project are references to media files on a storage device. When you edit an audio event in
an audio editor, you can choose to open the original media file or a copy of the file.
Opening a file in an audio editor
You can directly edit the media file to which an audio event is referenced. Any changes you make and save
in the audio editor are permanent and are reflected in the event in your project.
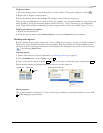
1.
Select the event to be edited.
2.
From the Tools menu, choose Audio, and choose Open in Audio Editor from the submenu.
Your selected audio editing application opens the event’s referenced media file. Make the necessary changes
and save the file in the audio editor. If you keep the media file’s name and location the same, its event is
updated immediately in your project. However, if you change the media file’s name or location (by using
Save As), you must import the edited (new) file into Vegas software.
Opening a copy of a file in an audio editor
You can also create a copy of an audio file and open it in an audio editor. Opening a copy of a file has the
advantage of preserving the original file unchanged. The modified copy is inserted into the event as a take
and is automatically added to the Project Media window.
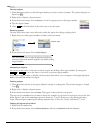
1.
Select the event to be edited.
2.
From the Tools menu, choose Audio, and choose Open Copy in Audio Editor from the submenu.
When you are finished editing, save the file. “Take X” is added to the end of the filename to distinguish it
from the original and adds it to the project as a take. If you save it to a new file (by using Save As), you must
manually add it as a take into the project. For more information, see Working with takes on page 130.