


80
USING THE MEDIA MANAGER CHP. 3
Merging subtags
Merging tags combines a selected tag with its subtags and removes the subtags from your library permanently.
To merge a tag with its subtags, right-click the tag and choose Merge Subtags into Selected Tag from the
shortcut menu.
All subtags are combined with the main tag, and the subtags are removed from the library. All media
formerly associated with the subtags is associated with the main tag.
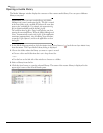
Arranging tags in the tag tree
Tags are displayed in a tree view in the Media Manager window. You can organize tags hierarchically: click
the Expand button (
) in the Search pane to expand a list, or click the Collapse button ( ) in the Search
pane to hide an expanded list.
You can drag, copy, and paste tags within the list to arrange them and create parent and child tags.
You can also display tags in a palette view by clicking the Change Tags View button ( ).
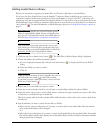
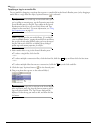
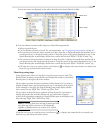
Editing tag names or images
1.
Double-click a tag (or right-click a tag and choose Edit from the shortcut menu) to display the Tag Editor
dialog.
2.
In the Tag name box, type the name you want to display for the tag.
3.
Select a thumbnail image to choose the icon that will be displayed for the tag in the Search pane and in
the Search Results pane when the tag is added to a media file.
4.
Click the OK button to apply your changes and close the Tag Editor dialog.
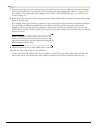
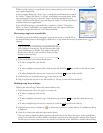
Viewing or creating palettes
The palette view provides another way of working with tags that can be useful for more focused searching.
You can use a palette to concentrate on a portion of the current tag tree.
In the palette view, tags are displayed as a grid of buttons instead of the standard hierarchical tag tree.
1.
Click the Change Tags View button ( ) to toggle the display of the tag tree and palette view.
2.
Click the down arrow next to the button to choose a saved palette or create a new palette.
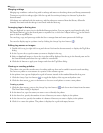
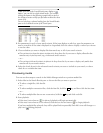
Creating a palette
1.
Click the down arrow next to the Change Tags View button ( ) and choose New Palette from the menu.
The New Palette dialog is displayed.
2.
In the Name box, type the name you want to use to identify the palette.
3.
In the Rows box, specify the number of rows of buttons you want to display in the palette.
4.
In the Columns box, specify the number of columns of buttons you want to display in the palette.
5.
Click OK to create the palette. The palette is displayed as a grid with empty buttons.