


104
BASIC EDITING TECHNIQUES CHP. 4
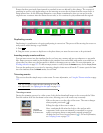
Trimming an event beyond its end
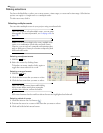
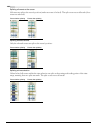
You can trim an event beyond its end, extending it as a result. Once extended, the event loops as a default.
A notch indicates where the looped event repeats.
Alternately, you can turn looping off and make the last frame of an event’s media repeat for the duration of
the event (a freeze frame). A notch appears at the point in the event where the video ends and the freeze
frame begins. For more information, see Loop on page 171.
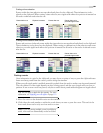
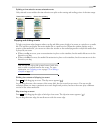
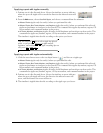
Trimming adjacent events
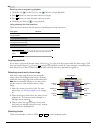
You can trim adjacent events simultaneously. Press while dragging the common edge between two
adjacent events. The trim adjacent cursor appears (
).
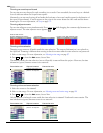
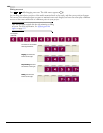
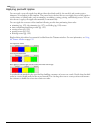
Trimming a time selection
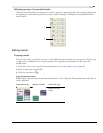
Trimming events removes all media outside the time selection. The removed information is not placed on
the clipboard. Trimming is different from cutting in that the events within the time selection are preserved.
1.
Select a time range. For more information, see Selecting a time range on page 97.
2.
Press or, from the Edit menu, choose Trim.
The material outside the time selection (across all tracks) is removed from the project. However, the time
information (space) between events is not removed.
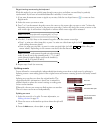
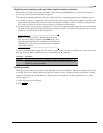
Trimming a time and event selection
1.
Select the events to be trimmed.
2.
Select a time range. For more information, see Selecting events and a time range on page 98.
3.
Press or, from the Edit menu, choose Trim.
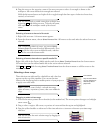
Only the portion of selected events outside the time selection is trimmed. Unselected events remain. The
time information (space) between events is not removed.
Events before trim Clipboard contents Events after trim
Trimmed information is not
placed on the clipboard.
Events before trim Clipboard contents Events after trim
Trimmed information is not
placed on the clipboard.
Ctrl +Alt
Press Ctrl+Alt over the
boundary between two events...
...and drag left... ...or right to trim both events at once.
Ctrl +T
Ctrl +T