CHP. 11 RECORDING AUDIO
201
Preparing to record
Before you record, you must arm the tracks into which you will record the new audio. You must also select
the recording settings for the tracks. You have the additional options of using a metronome or turning off
playback during recording.
You may record into an empty track, a time selection, an event, or a combination of time and event
selection. You can also record multiple takes for an event so you can maintain multiple versions of an event
that you may play back and edit.
Tip:
Select a media bin before recording if you want to
automatically add your recorded audio to a media bin. To
save track effects with your recorded files, create an effects
package of the track effect settings and apply the chain to the
event as a non-real time event effect.
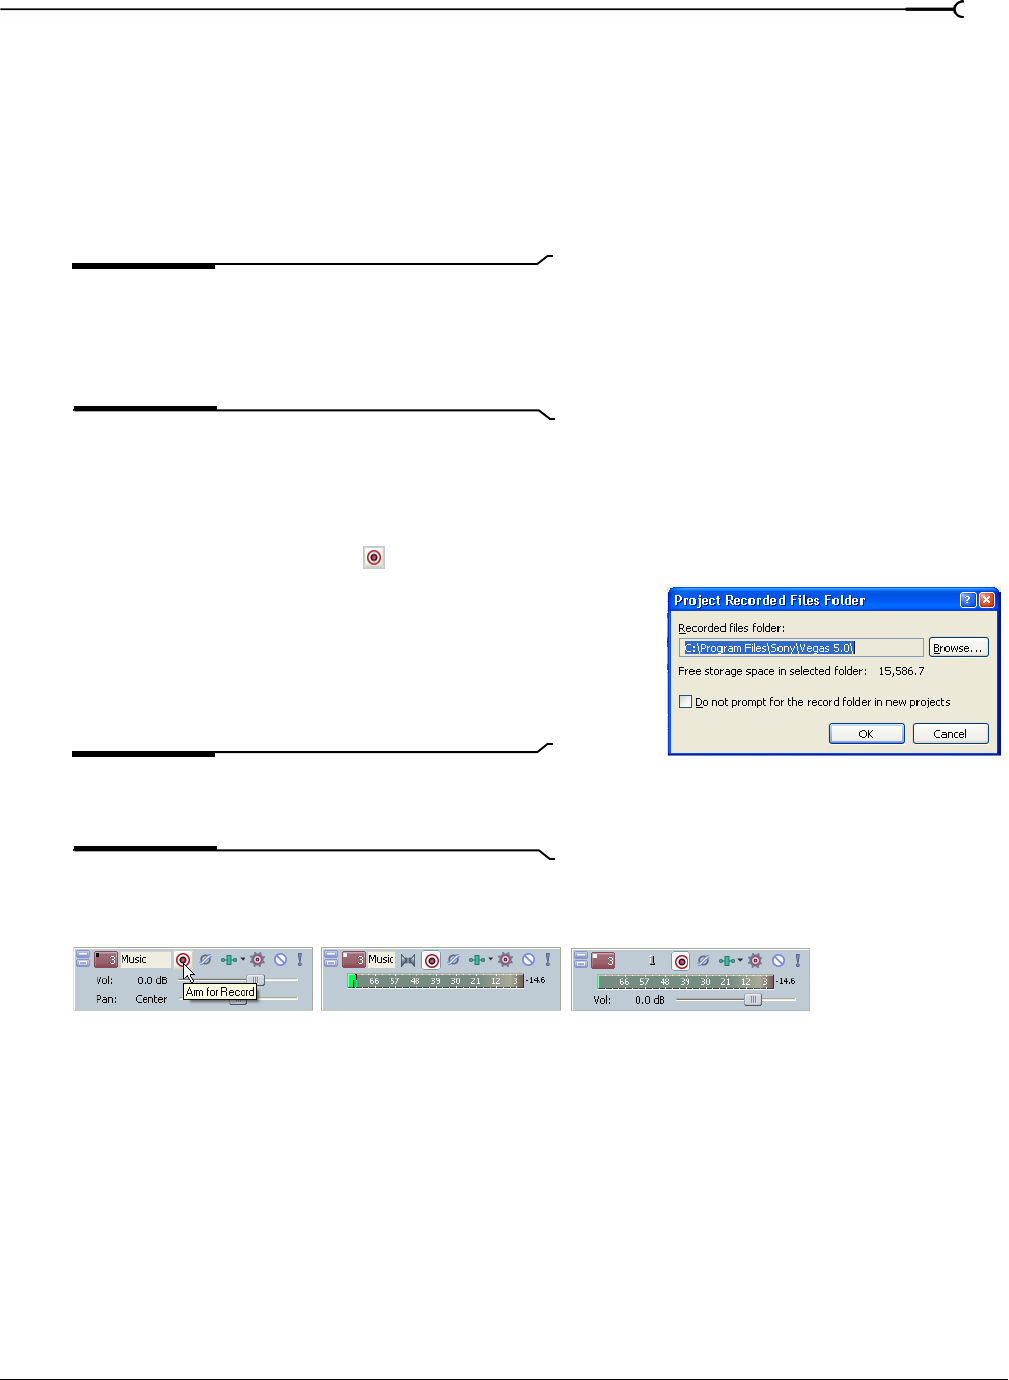
Arming the track for recording
Whether recording into an existing track, an empty track, a selected event, or a time selection, you must
prepare a track for recording. You can arm multiple tracks prior to recording.
1.
Click the Arm for Record button ( ) in the track list.
The first time you arm a track to record in a project, the Project
Recorded Files Folder dialog displays.
2.
Browse to the location where you want to save your recorded
audio files.
3.
Click OK.
Tip:
You can change the location where recorded files are
saved at any time. For more information, see Specifying
where recordings are stored on page 206.
Once a track is armed, a record meter appears in the track list. Depending on your hardware, a record gain
fader may also appear.
Track is ready for recordingArm the track first.
using the Sound Mapper.
Track is ready for recording
from a specific device.


