CHP. 4 BASIC EDITING TECHNIQUES
121
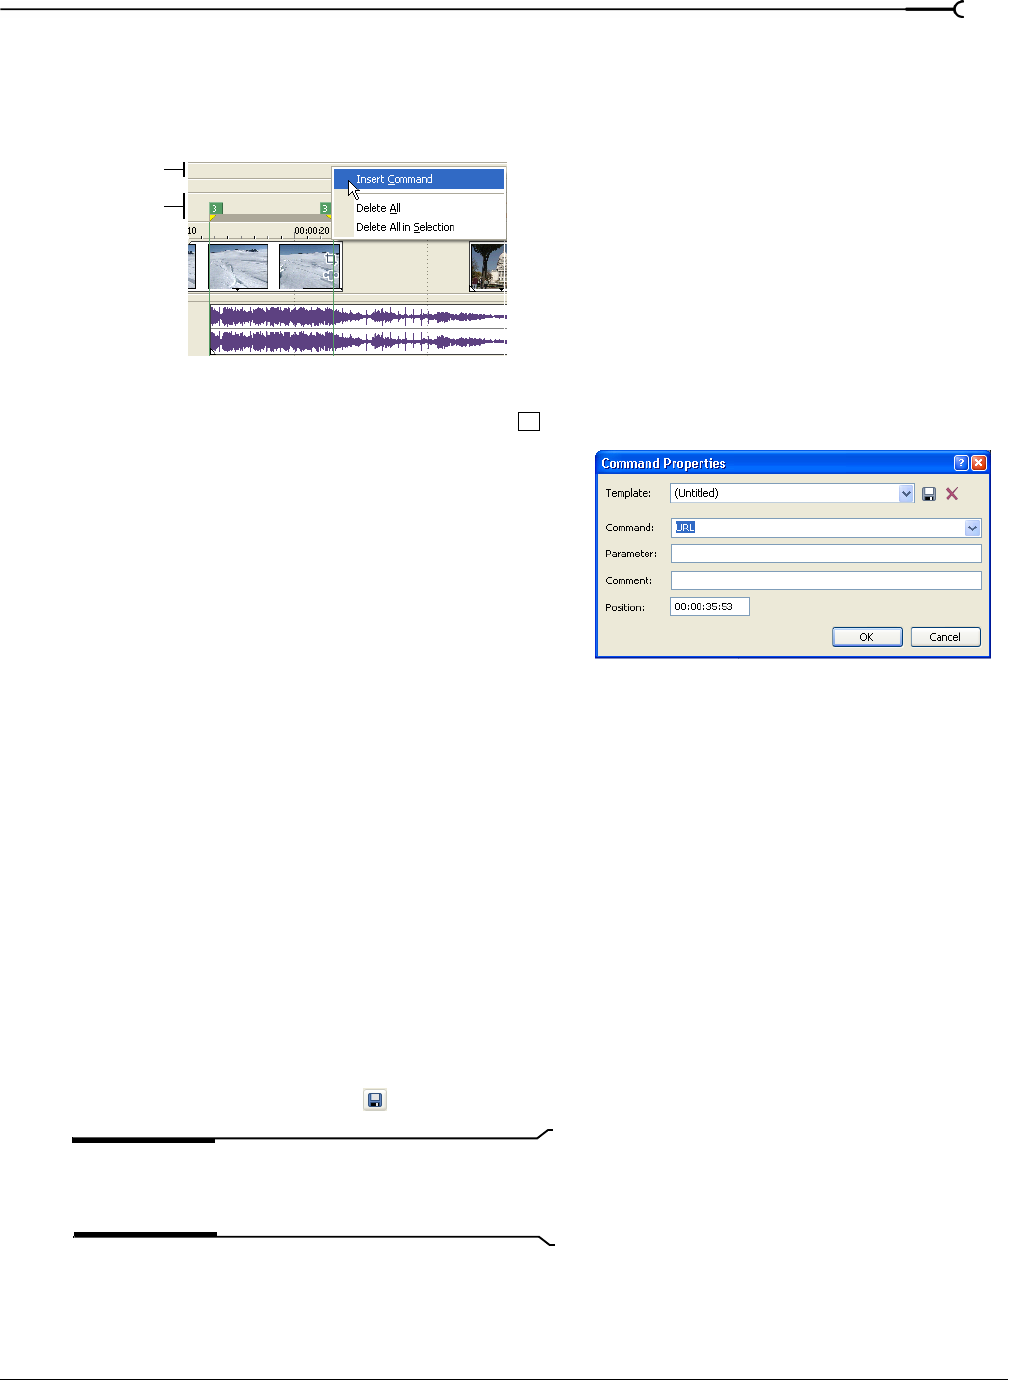
Inserting command markers
Command markers appear as blue tags on the command bar, which is above the marker bar.
1.
Position the cursor where you want to place the command marker.
2.
From the Insert menu, choose Command, or press .
3.
Complete the Command Properties dialog:
• If desired, choose a custom template from the
Templ ate drop-down list. For more information, see
Saving command properties as a custom template on page
121.
• Choose the type of command from the Command
drop-down list.
•In the Parameter box, enter parameters to define the
behavior of the command.
• Enter your own notes or comments in the Comments box.
• Specify the timing of the command in the Position box. Otherwise, command markers are automatically
set to the current cursor position.
4.
Click OK. The new command marker appears on the command bar.
Editing command properties
Double-click any command marker to open the Command Properties dialog and edit its contents. You can
also right-click a command marker and choose
Edit from the shortcut menu.
Saving command properties as a custom template
If you plan to use a command more than once, you can save command properties as a template. You can then
reuse the command properties by choosing the template from the
Template drop-down list.
1.
Create a command and complete the Command Properties dialog.
2.
Enter a name for the template in the Te mplate box.
3.
Click the Save Template button ( ).
Note:
Your metadata command templates are saved in the
cmdtemp.xml file in the program folder. You can edit this file
directly to modify your templates.
Marker bar
Command bar
Right-click to place a command marker
on the command bar
C


