


48
GETTING STARTED CHP. 2
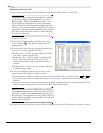
Adding media to the Project Media list
You can add media to the Project Media list without adding it to the timeline by importing the file. For more
information, see Importing media on page 53.
Adding media to the Project Media list from the Explorer window
1.
Navigate to and select a file to add to the Project Media list. You can use or to select multiple
media files.
2.
Right-click the file and choose Add to Project Media list from the shortcut menu. The selected file is added
to the Project Media window.
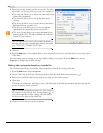
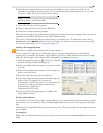
Replacing media in the Project Media window
You may replace a file in the Project Media window with a different file. When changing the media file that
an event contains, every occurrence of the event on the timeline is updated with the new media file
contents.
1.
Right-click a file in the Project Media window.
2.
Choose Replace from the shortcut menu.
3.
In the Replace Media File dialog, browse for and select the file that you want to replace the current file.
4.
Click Open. The selected file replaces the old file in the Project Media list, and any events in the timeline
containing the old file are updated to contain the new media file.
Capturing video
You can use the Sony Video Capture application installed with Vegas software to capture video clips from
your DV or HDV video camera or via your Blackmagic Design DeckLink™ card and add them to the Project
Media window. You can also specify a different third-party capture application for video capture.
HDV video capture is available only in the full version of Vegas software and in Vegas Movie Studio Platinum
software.
Tip:
To specify the video capture application you want to use
with the full version of Vegas software or in Vegas Movie
Studio Platinum software, check the
Use external video
capture application
check box on the Video tab of the
Preferences window and browse for the program’s executable
(.EXE) file.
To specify the video capture application you want to use with
Vegas Movie Studio Platinum software, browse for the
program’s executable using the
Browse button next to the
Preferred video capture application box on the Video tab of the
Preferences window.
1.
If you have not already done so, connect your video camera to your video capture card using the cable
provided with the card.
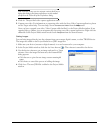
2.
From the File menu, choose Capture Video or click the Capture Video button ( ) in the Project Media
window. The Capture Video dialog displays.
3.
Choose the option you want to use for capturing video:
• Use external video capture application - select this option to capture DV or Video for Windows footage
using the video capture application specified on the Video tab of the Preferences dialog.
• Use internal video capture application - select this option to capture HDV or SDI footage using the Vegas
video capture application.
Ctrl Shift