


CHP. 15 ADDING VIDEO TRANSITIONS AND MOTION
279
8.
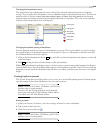
Preview the event. Add and adjust keyframes as needed to create the desired effect. You can adjust both
temporal and spatial interpolation for each keyframe:
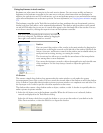
• Temporal interpolation (how the pan occurs over time) is controlled by the keyframe interpolation
curve type. Experiment with temporal interpolation by right-clicking a keyframe to change the
interpolation curve type (hold, linear, fast, slow, smooth) and previewing the result. For more
information, see Changing the interpolation curve on page 275.
• Spatial interpolation (how the pan occurs within the video image) is controlled by the Smoothness
setting of each keyframe. A smoothness value of 0 makes the movement linear from one keyframe to the
next. A higher smoothness value makes the path of the pan more curved. Select a keyframe and change
the
Smoothness value to adjust spatial interpolation.
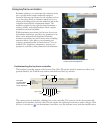
Animating video effects plug-ins
You can use keyframe animation to smoothly and gradually apply an effect to an event. This example uses
the Add Noise plug-in. The Add Noise plug-in adds static or noise to a video sequence. When added to a
simple solid-colored background with a monochrome setting and animated, a pattern is produced that is
similar to a television that is not tuned to any station.
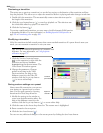
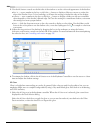
1.
Add an Add Noise plug-in to an event. For more information, see Adding a video effects plug-in on page 242.
The Video FX window appears with the keyframe controller at the bottom of the window.
2.
Add two keyframes to the event for a total of three including the one at the beginning. New keyframe
attributes are copied from the previous keyframe.
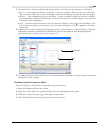
3.
Click the first keyframe to select it. Drag the Noise level slider to 0.
4.
Click the last keyframe to select it. Drag the Noise level slider to 0.
5.
Click the second keyframe to select it. From the Preset drop-down list, select Grainy.
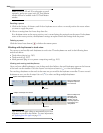
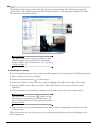
6.
Hold and drag the second keyframe to duplicate it. Position this new keyframe between the second
and final keyframes.
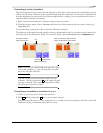
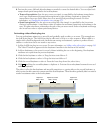
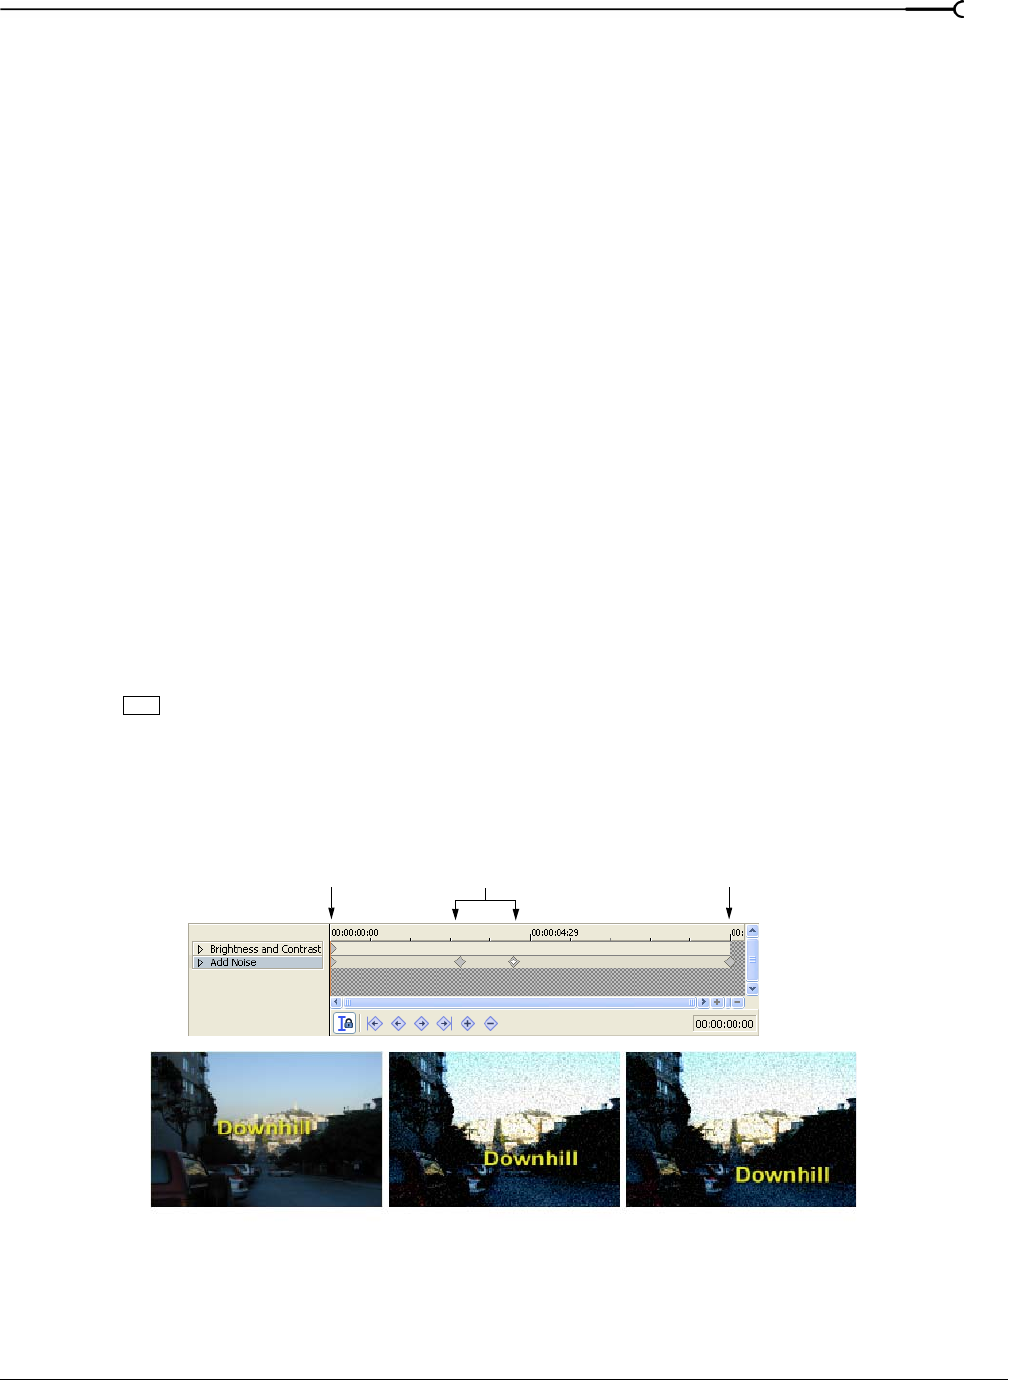
The effect is off at the first keyframe and smoothly transitions to a grainy effect at the second keyframe, at
which point the effect remains constant until the third keyframe. Then the effect gradually fades out until it
reaches a minimum value at the last keyframe.
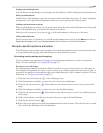
Ctrl
Keyframe 1
Noise = None
Keyframes 2 and 3
Noise = Grainy
Keyframe 4
Noise = None
The results of gradually transitioning into an effect using keyframe animation.