


CHP. 15 ADDING VIDEO TRANSITIONS AND MOTION
285
2.
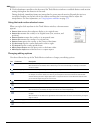
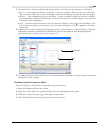
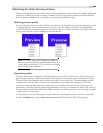
Use the 2D Glow controls on the left side of the window to set the color and appearance of the glow:
• Blur % — type a number in the box or click the button to display a slider you can use to soften the
edge of the glow effect. Set to 0 for a hard edge, or increase the setting to feather the edge of the glow.
• Intensity — type a number in the box or click the button to display a slider you can use to establish
the transparency of the glow’s blurred edge. Decrease the setting for a translucent glow, or increase the
setting for a more opaque glow.
• Color — click the down arrow next to the color swatch to display a color picker. Use the sliders or edit
boxes in the color picker to set the glow color, or use the eyedropper tool (
) to sample a color from
your screen.
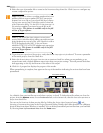
3.
Adjust the size position of the glow by dragging the box in the workspace or using the Position, Orientation,
and
Rotation controls on the left side of the window. For more information about manipulating the
selection box, see Controlling track motion on page 281.
4.
To animate the glow, click in the 2D Glow row of the Keyframe Controller to set the cursor to a later time
and adjust the glow settings.
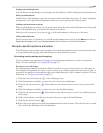
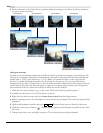
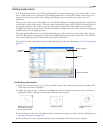
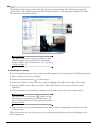
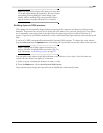
Creating a picture-in-picture effect
Picture-in-picture is an easy effect to reproduce using track motion.
1.
Insert the background video into a track.
2.
Insert the overlay video into another track just above the background video track.
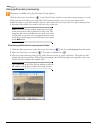
3.
Click the Track Motion button ( ) on the upper overlay track.
4.
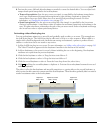
In the Track Motion window, position and resize the track area.
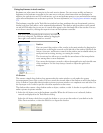
Cropped video
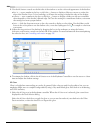
Glow