176
WORKING WITH EVENTS CHP. 8
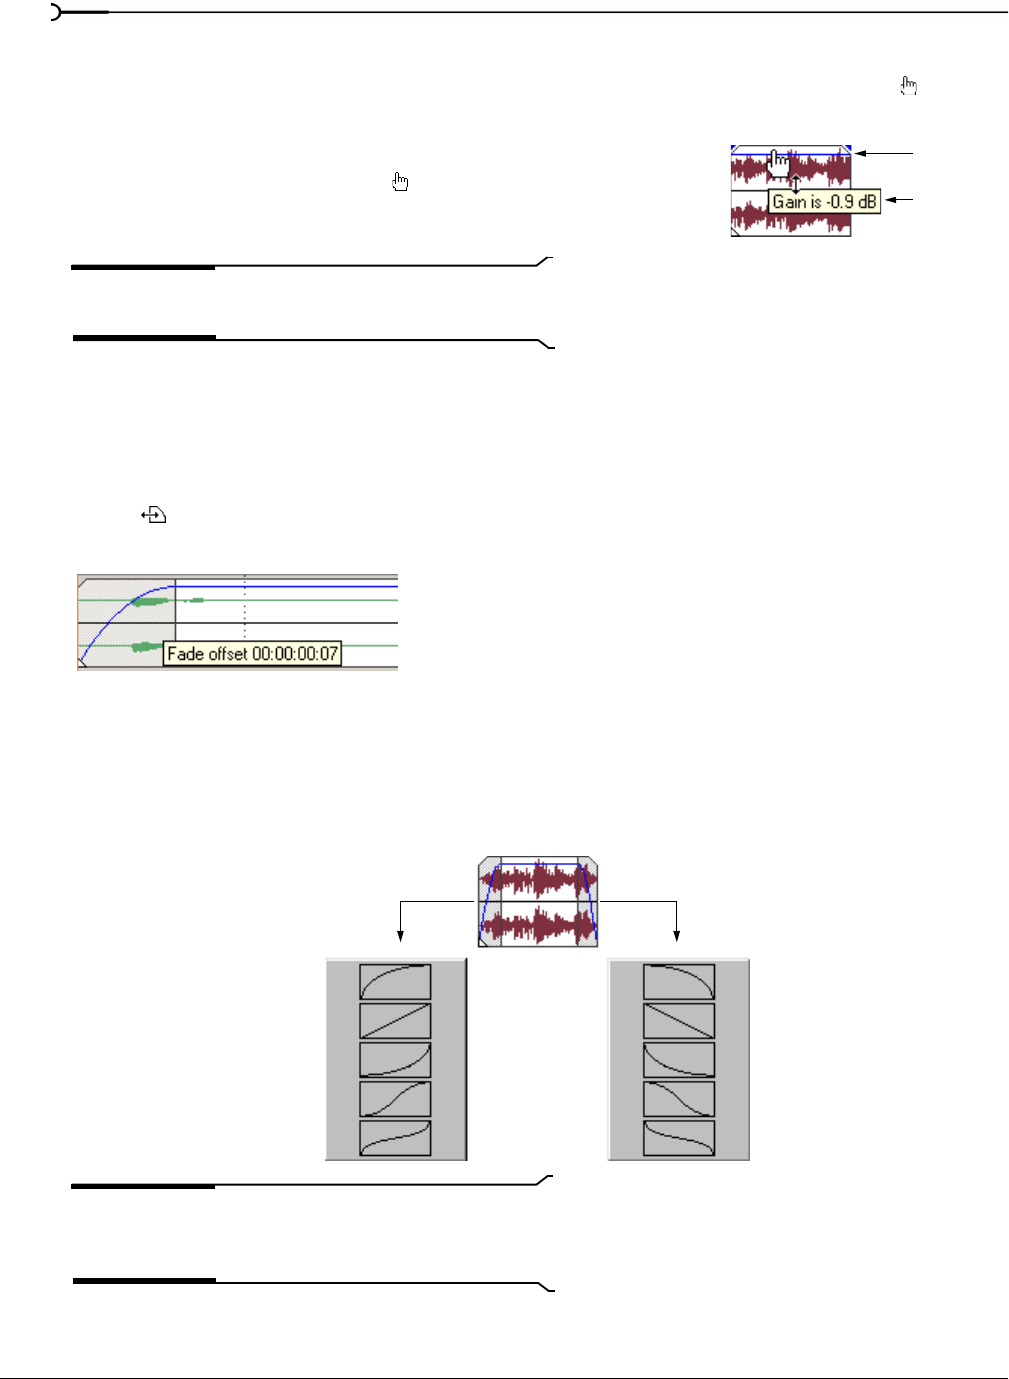
Setting an audio event’s volume
When you place the mouse pointer at the top of the event, the pointer changes to a hand cursor ( ) that you
can use to lower the event’s overall volume.
1.
Place the mouse pointer at the top of the event.
2.
When you see the envelope cursor ( ), drag the volume envelope
to the desired level. As you drag, the event’s decibel level is
displayed.
Note:
When you have multiple events selected, the gain of
all selected events is adjusted simultaneously.
Setting an event’s fade in and out
The event handles allow you to change an audio event’s fade in and out volume. You can also change the
type of curve that the event uses to control the volume’s fade in or out.
1.
Place the mouse pointer on a handle (upper corners of the event). The pointer changes to the envelope
cursor (
).
2.
Click the corner of the event and drag to create a fade.
To remove a fade, drag the end of the fade curve back to the edge of the event.
Changing an event’s fade curve
You can set the shape of the fade curve (fast, linear, slow, sharp, or smooth) that an event uses to raise or
lower the volume over time. To access the different fade curves, right-click anywhere in the event’s fade-in
or fade-out region and choose
Fade Type from the shortcut menu.
Tip:
If you use the same fade curve frequently, you can set it
as a default for all new audio event envelopes. For more
information, see Editing tab on page 349.
Volume line
Decibel level
Fast
Linear
Slow
Smooth
Sharp
Right-click to select
the fade curve type


